Monthly Archives: February 2016

Last updated by at .

Brew Day 13 Reddit Collaboration APA Batch 2

Last brew day I made a short boil no chill version of a collaboration brew that was suggested on the /r/homebrewing on Reddit. You can read the full report of that day here. It turned out beautifully and for the first time I felt like my usual 12.5L brew size was too small as I drank through most of the delicious hoppy APA far too quickly. Planning was put inplace to brew another batch but and my lovely partner splashed out on a fantastic 33L stainless steel boil kettle for me so I seized the opportunity to make a bigger batch of 20 liters. I cracked out my handy brew in a bag spreadsheet, scaled the recipe up and arrived at the following:

Ale Barret Burston 2 Row 3.26kg
Ale Maris Otter 0.93kg
CaraPils 0.22g
Caramalt Malt 0.22kg
Oats, Flaked 0.22kg

Magnum 14g (12.7%AA) @ 30 minutes
Amarillo 8g (9.5% AA) @ 5 minutes
Citra 8g (13.2% AA) @ 5 minutes
Amarillo 15g @ Flameout
Citra 15g @ Flameout
Amarillo 40g Dry Hop 3 days
Citra 35g Dry Hop3 days

British S04 Ale Yeast

Brew Type : 20L All Grain (BIAB)

OG: 1.054
FG: 1.015
ABV: 5.6%
IBU: 23.2
EBC: 11.4

As this is a no-chill brew again I’m treating the flameout additions as 10 minute additions meaning that the 23.2IBU is low and it’s likely that this beer will be 40-45IBUs. Other changes include using harvested S04 yeast instead if US05, and toning down the dry hopping somewhat because, well, hops are expensive.

Mashing In

Mashing In

Post Mash Gravity

Post Mash Gravity

S04 British Ale Yeast Starter

S04 British Ale Yeast Starter

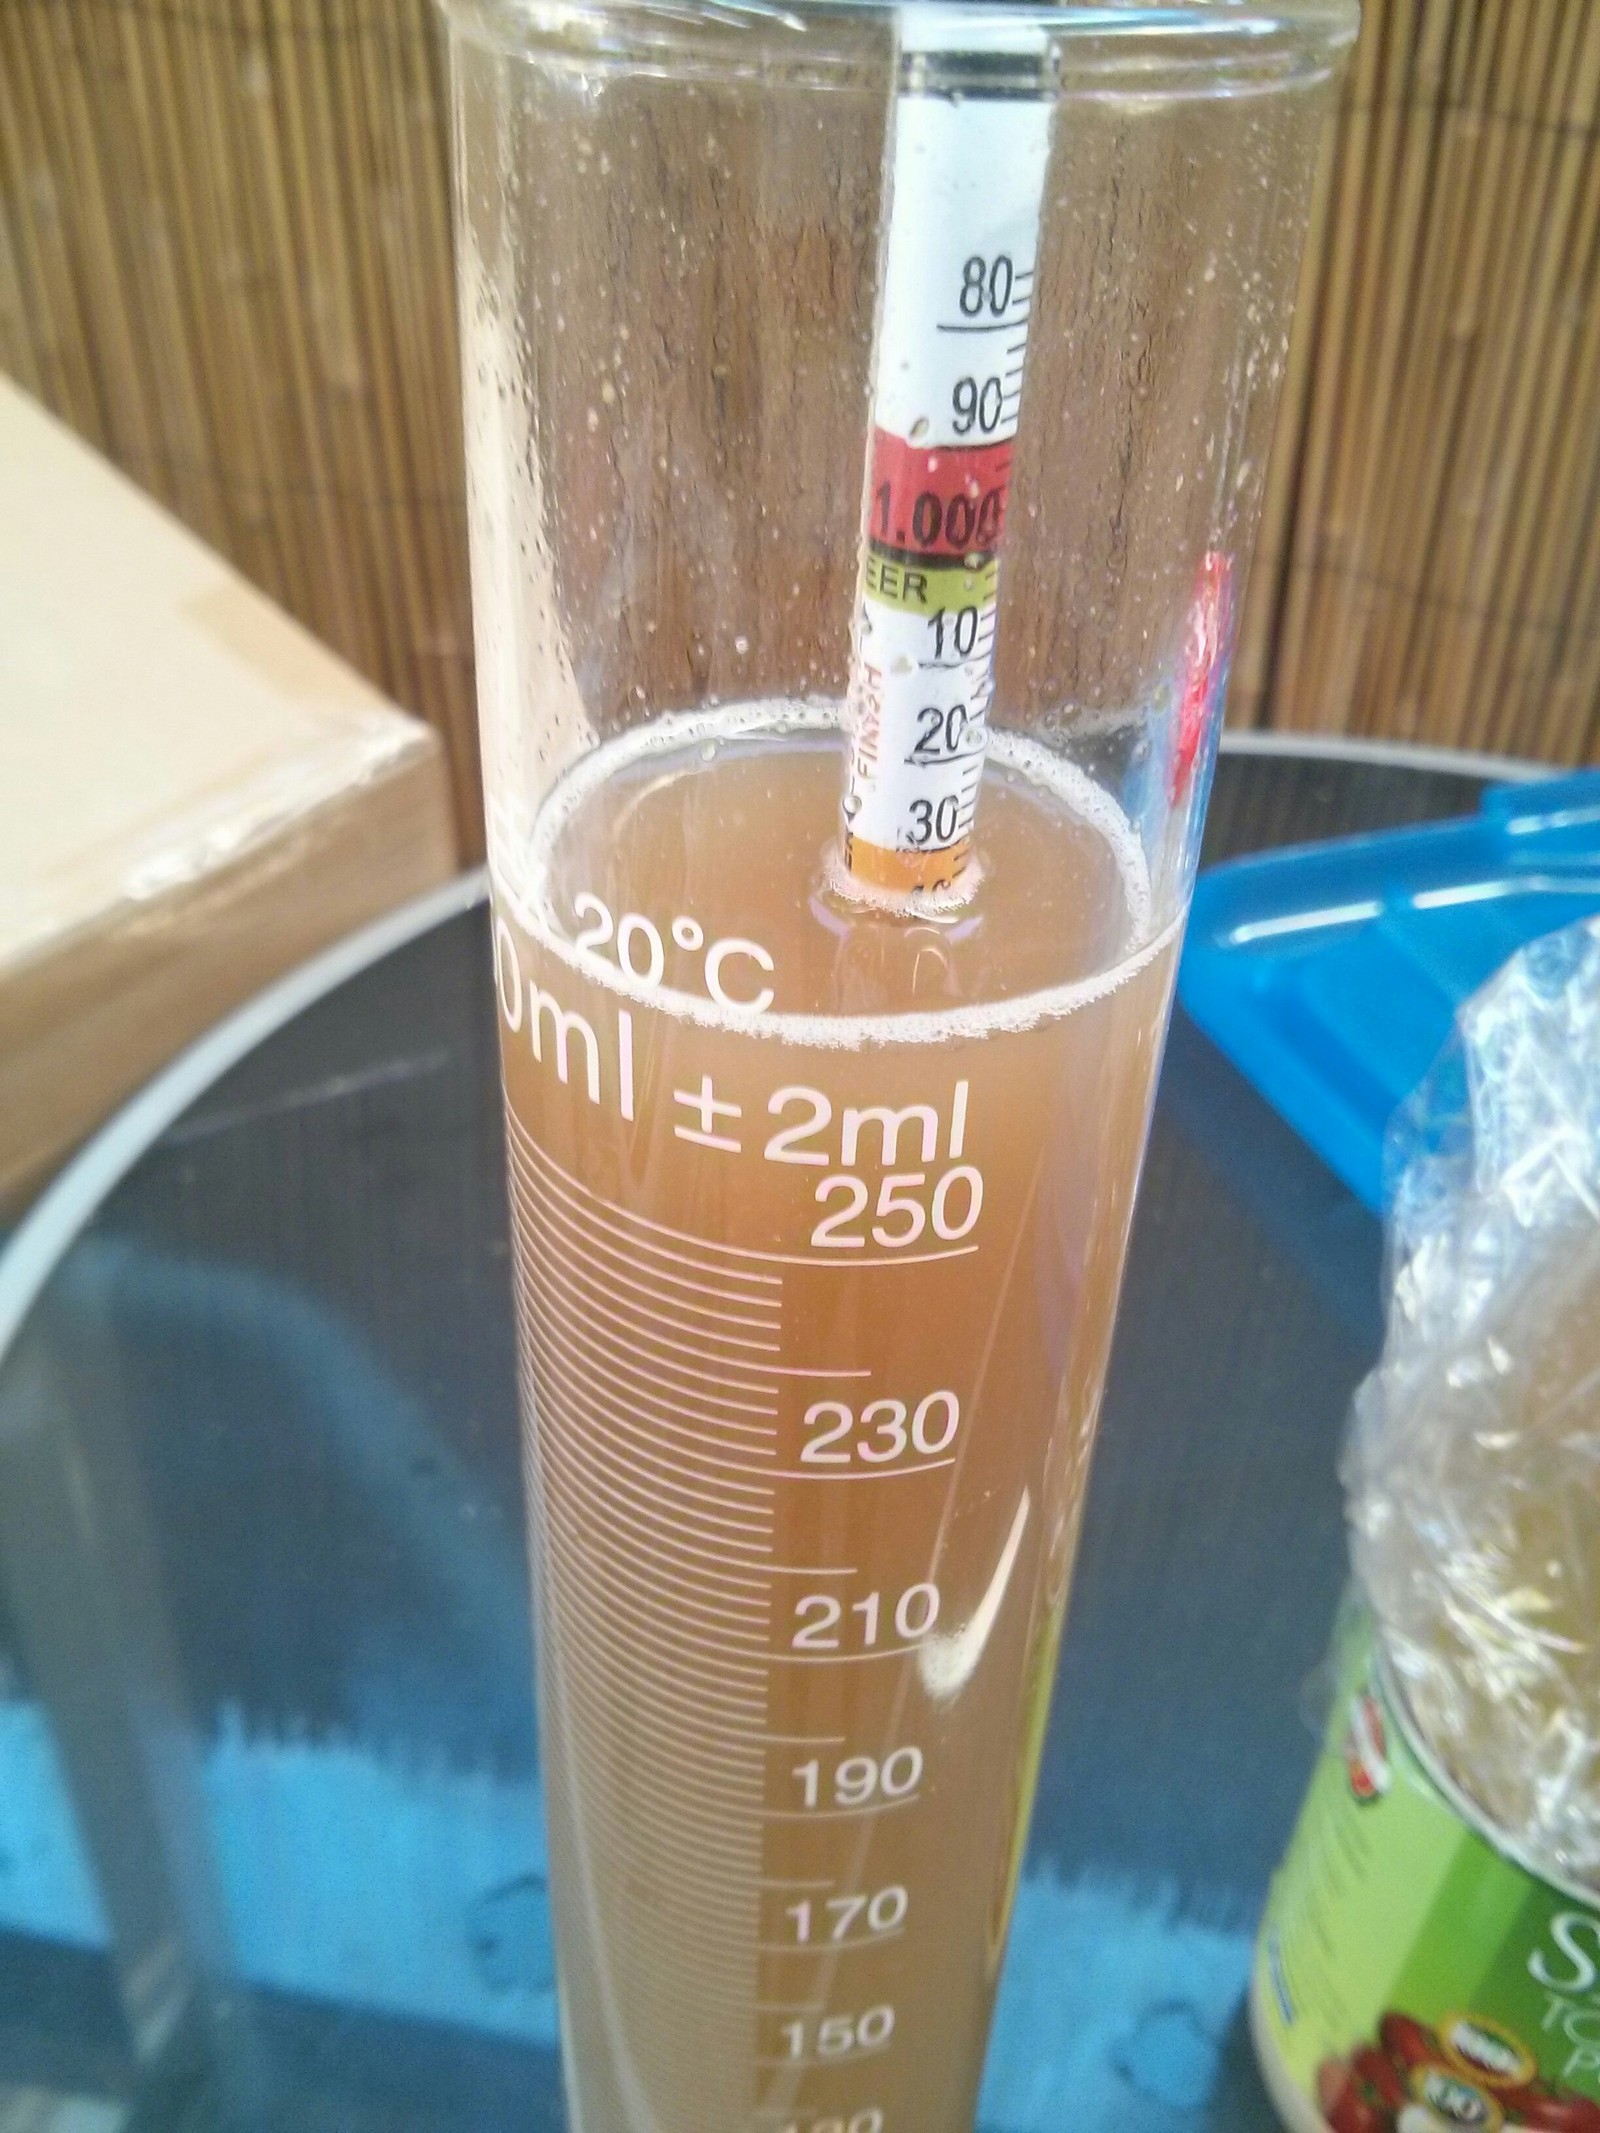
As usual I shot for a 60 minute mash, I chose 20L of strike water heated to 72C to which I added my grain. Rather than use a brew bag I used 4 square meters of white Swiss Voile fabric. I hit the strike temperature exactly in my shiny new 33L pot, added the grains, stirred for a few minutes before putting the lid on and wrapping up the pot in an insulating doona. There it sat for an hour varying very little from the initial mash temperature of 69.6C, dropping just 1.6C to 68.0C. It’s at this point where I started to mess things up. The first mistake (I think) had already happened as I hadn’t mixed the mash at all during the hour of rest and my mash efficiency was crap. Second, I chose to sparge with too much water (10L) for two reasons. Firstly I’d done my calculations assuming there was a 60 minute boil, but of course there was only a 30 minute boil, and I’d assumed a too high evaporation rate during the boil. As a result I ended up with 26.5L of pre-boil wort with an SG of 1.025 at 64C (corrected to 1.040).

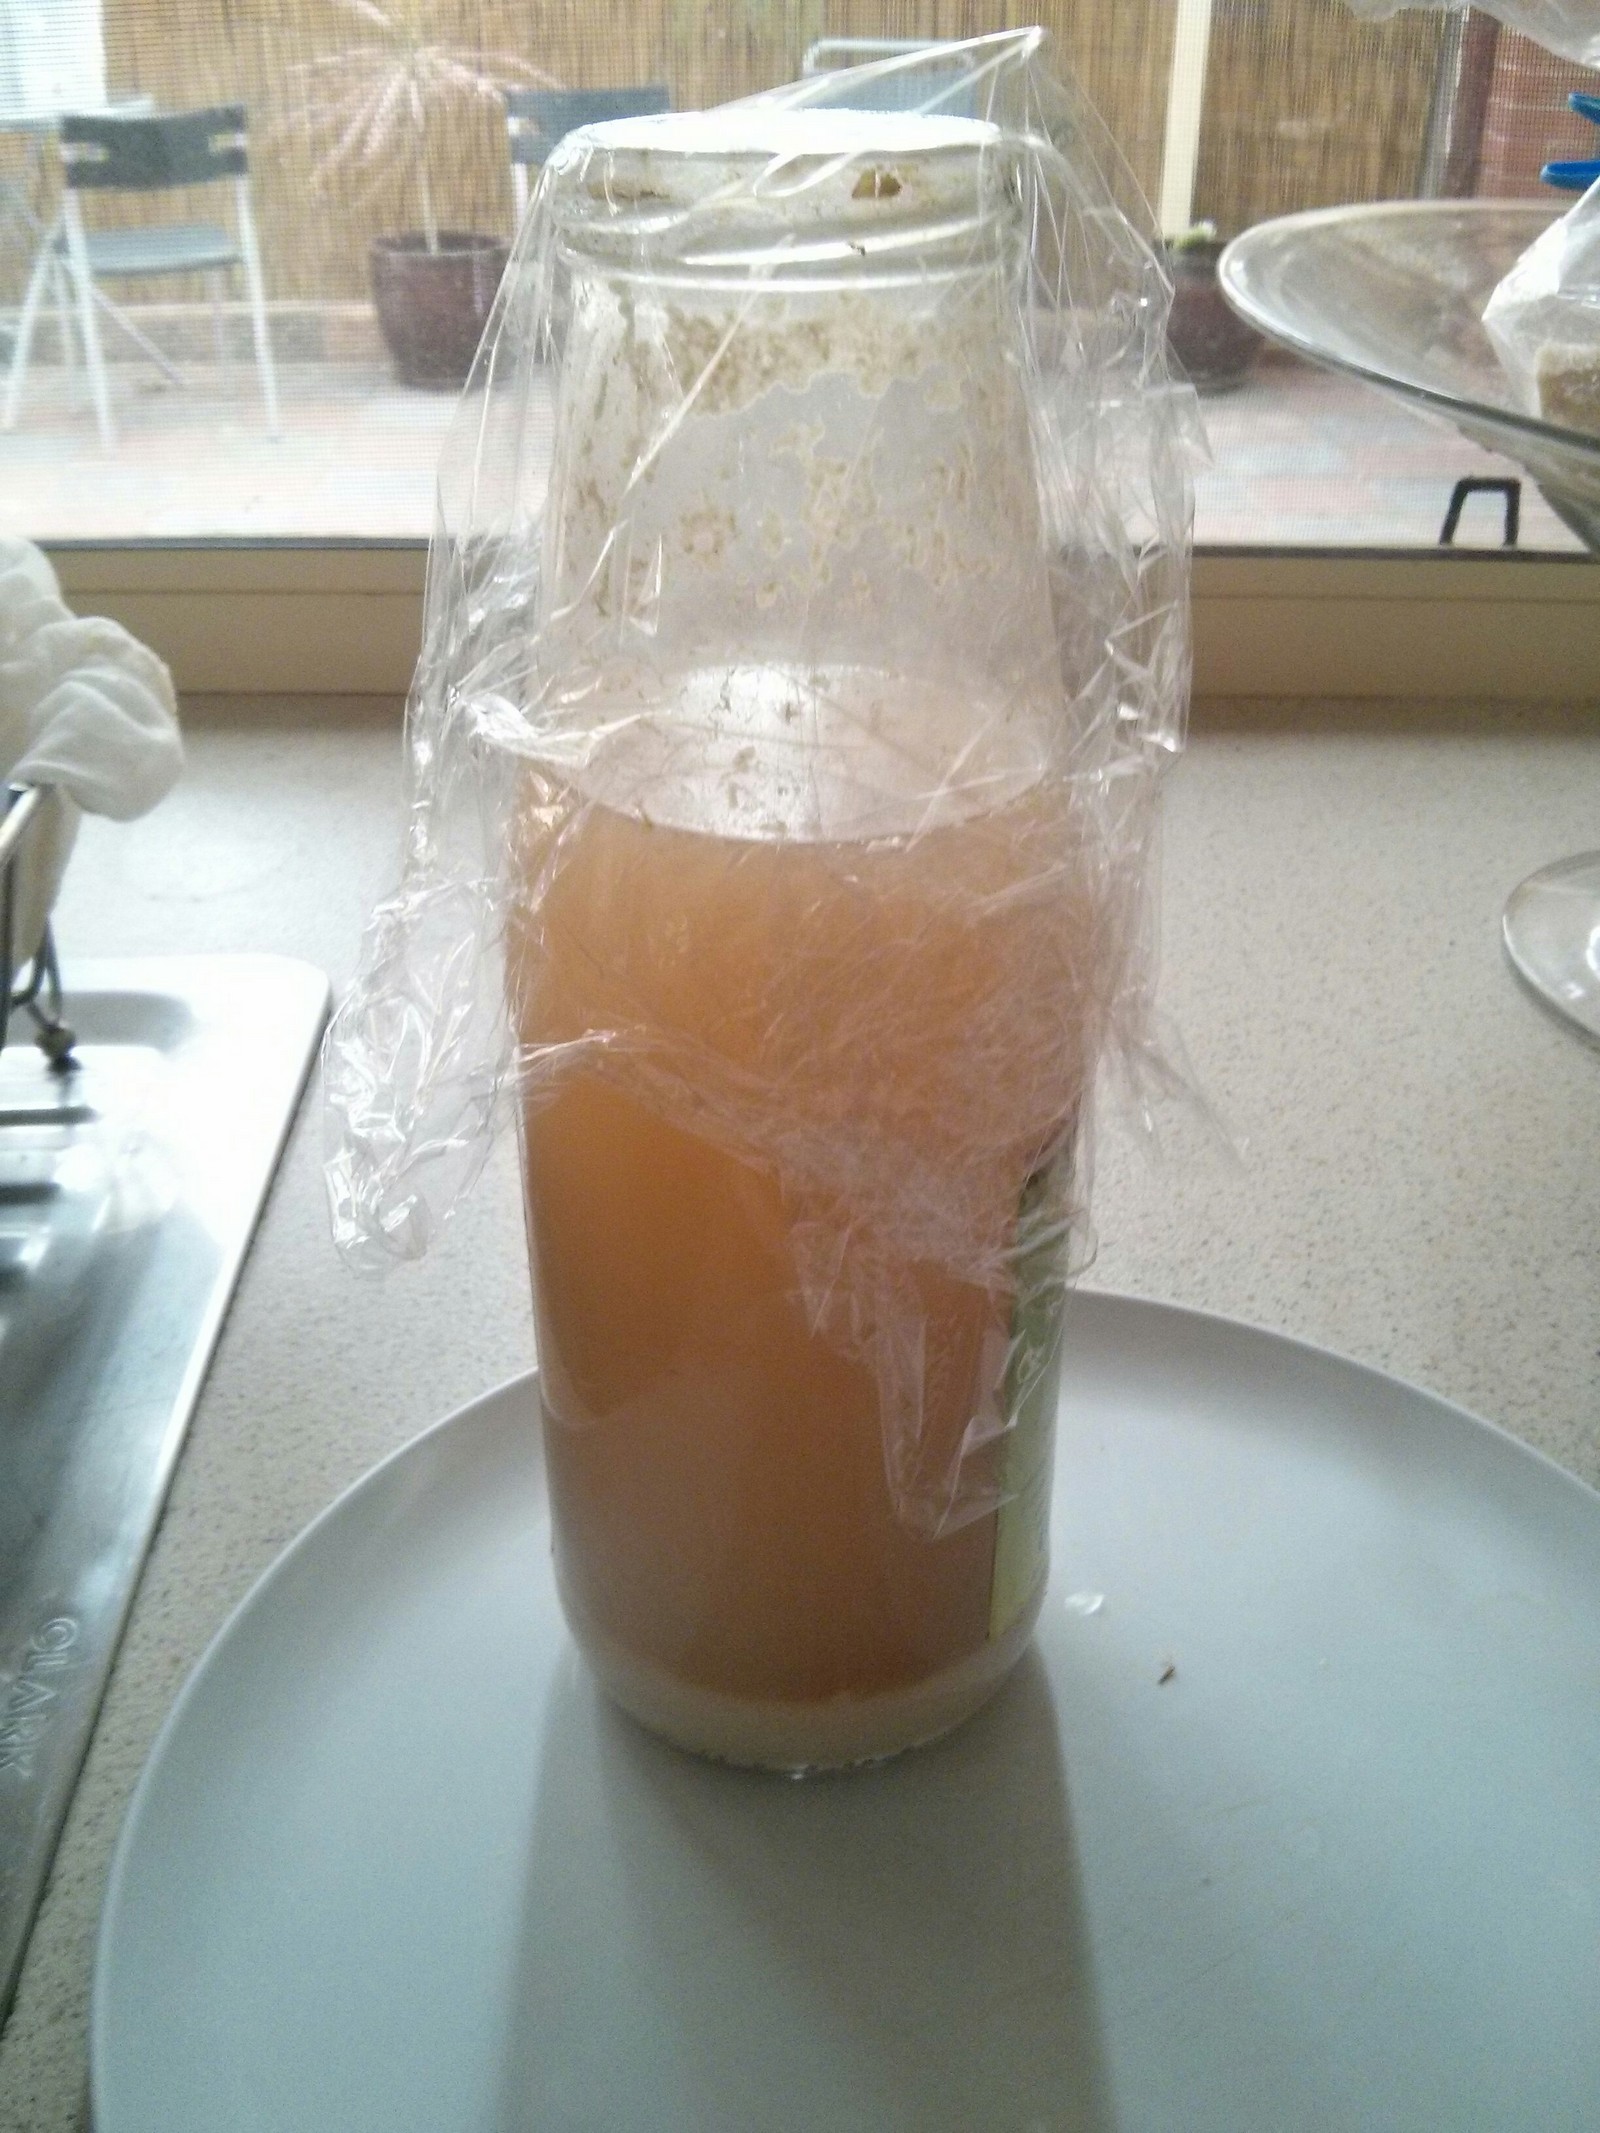
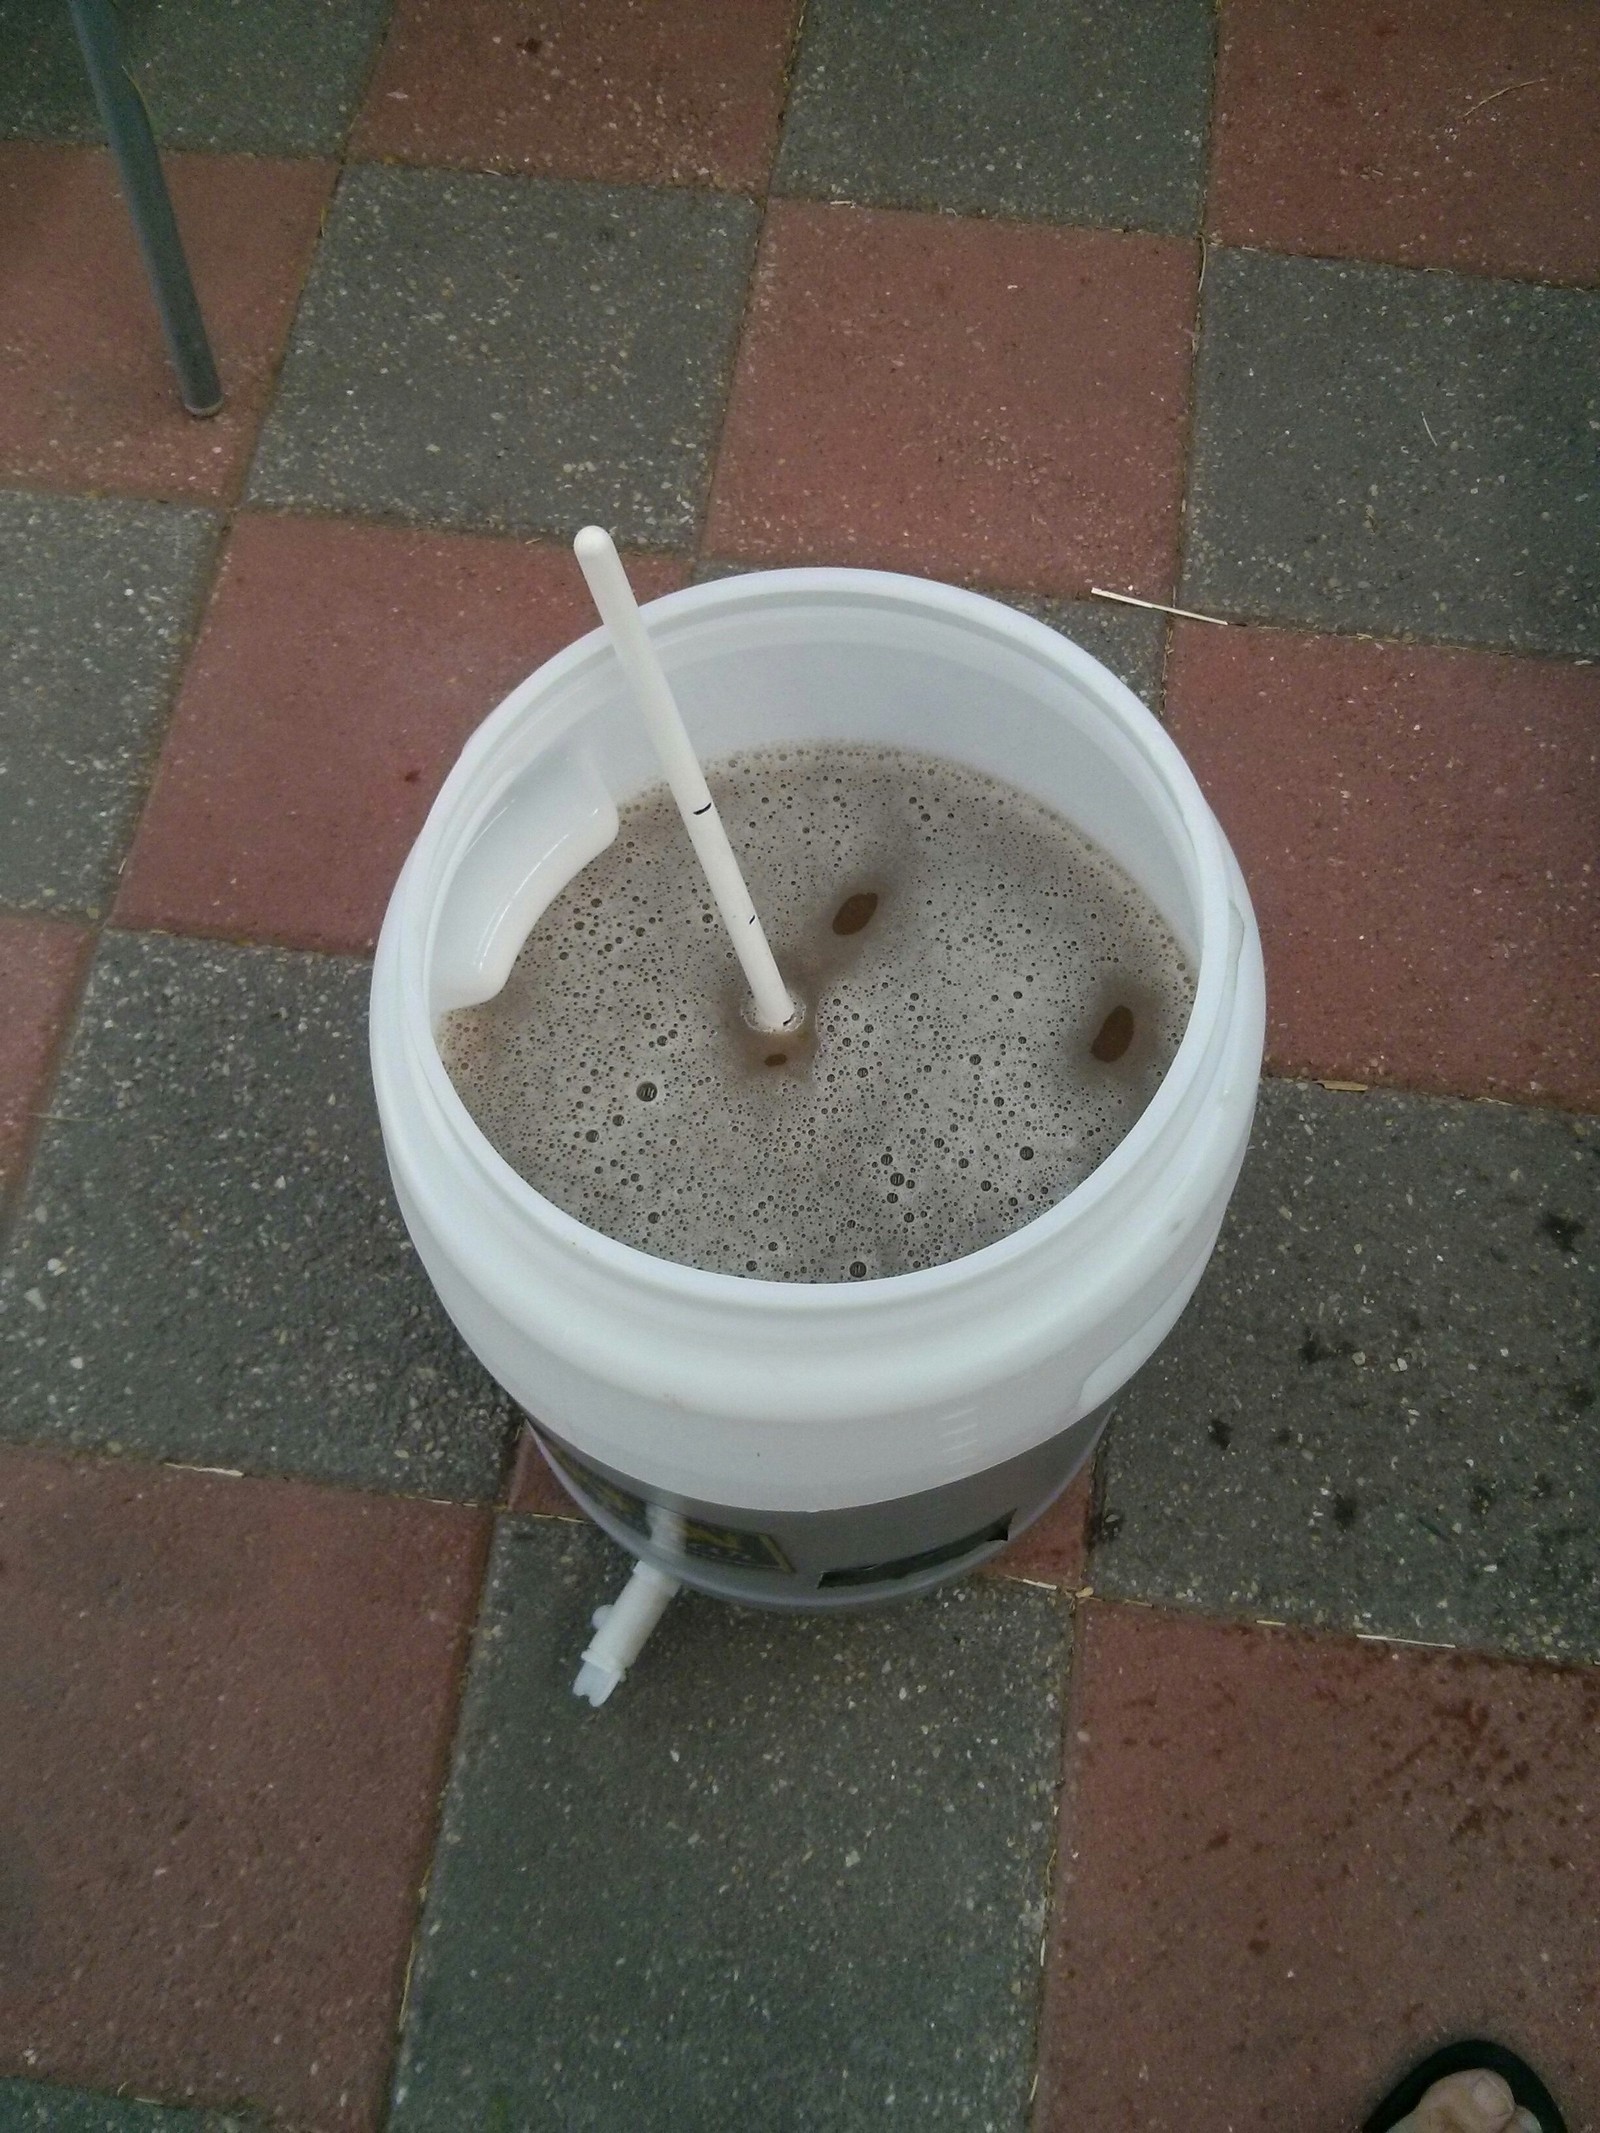
The boil itself went fine, I made my hop additions and at flameout allowed the wort to stand for 10 minutes. I did make use of some new stainless steel hop balls to try to improve wort clarity. At the end of this process I still had 24L of wort left in the pot. The pot, wort and all went into my refrigerator and was brought down to my final pitching temperature of 26C nearly 24 hours later. At that point I took a gravity reading (1.036???) and pitched the S04 yeast that I’d put into a 600mL starter the day before. It all went back into my temperature controlled fridge where fermentation started within 12 hours.
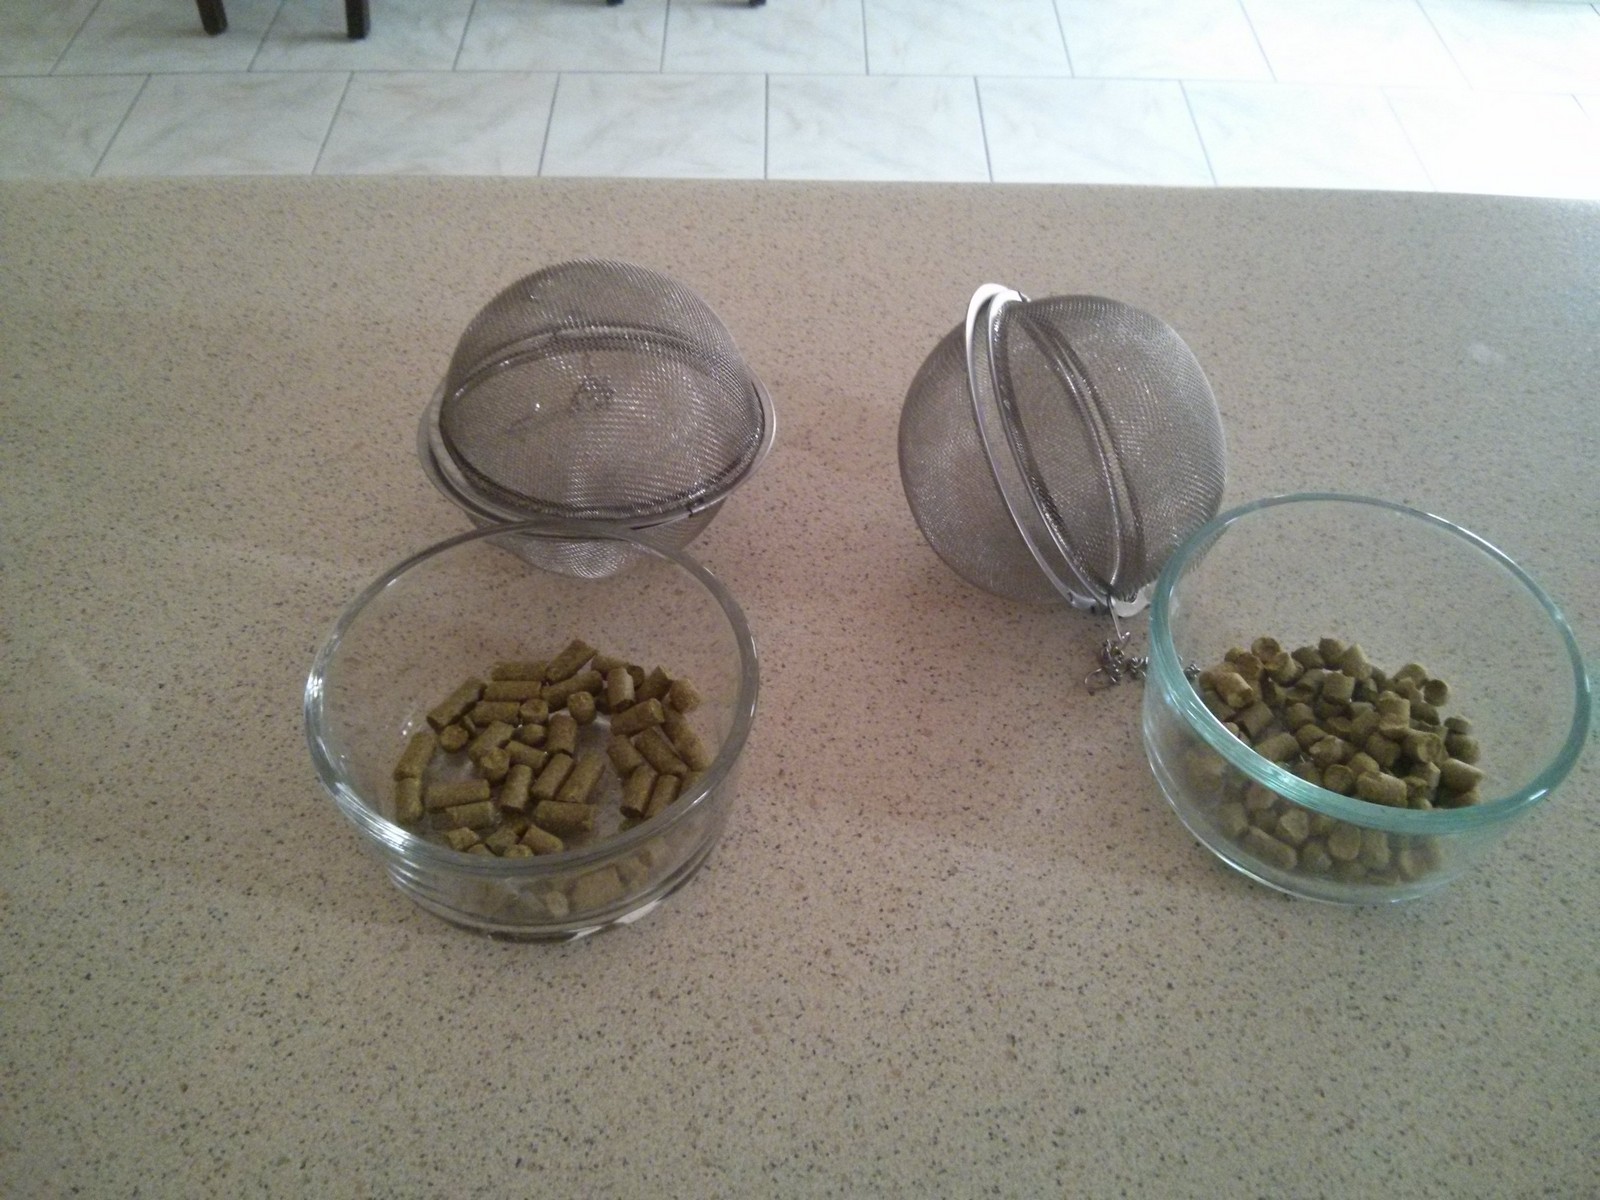
Hop Balls!

Hop Balls!

Pitching the Yeast

Pitching the Yeast

Initial Gravity

Initial Gravity

What Went Wrong

So much went wrong with this it’s embarrassing. Firstly my mash efficiency was up the shit, secondly my pre-boil volume was way two high, third I think I got my 10 minute hop additions wrong (they should have been 5 minute additions), and finally there’s something screwy with my SG readings. A corrected pre-boil SG of 1.040 cannot become a gravity of 1.036 post boil. Not actually possible, SG has to go up if you’ve removed water. My post boil volume of 24L is too high, which means the ABV is going to be down, given my usual mash efficiency the final gravity should be about 1.043. The final thing that went wrong was the sheer size of the batch. Everything was too heavy. I did manage but I was nervous handling 30 kilograms of stainless steel and near boiling wort as I lifted it from the ground to my stovetop. And speaking of the stovetop, it struggled to maintain a good rolling boil.

So what will I do different next time? Not sure yet, let’s see how this mid-strength hoppy ale turns out. If it’s crap I will re-evaluate my whole process. If it’s good I might see if I can repeat my mistakes on a smaller 15L batch.

Bulk Priming and Bottling

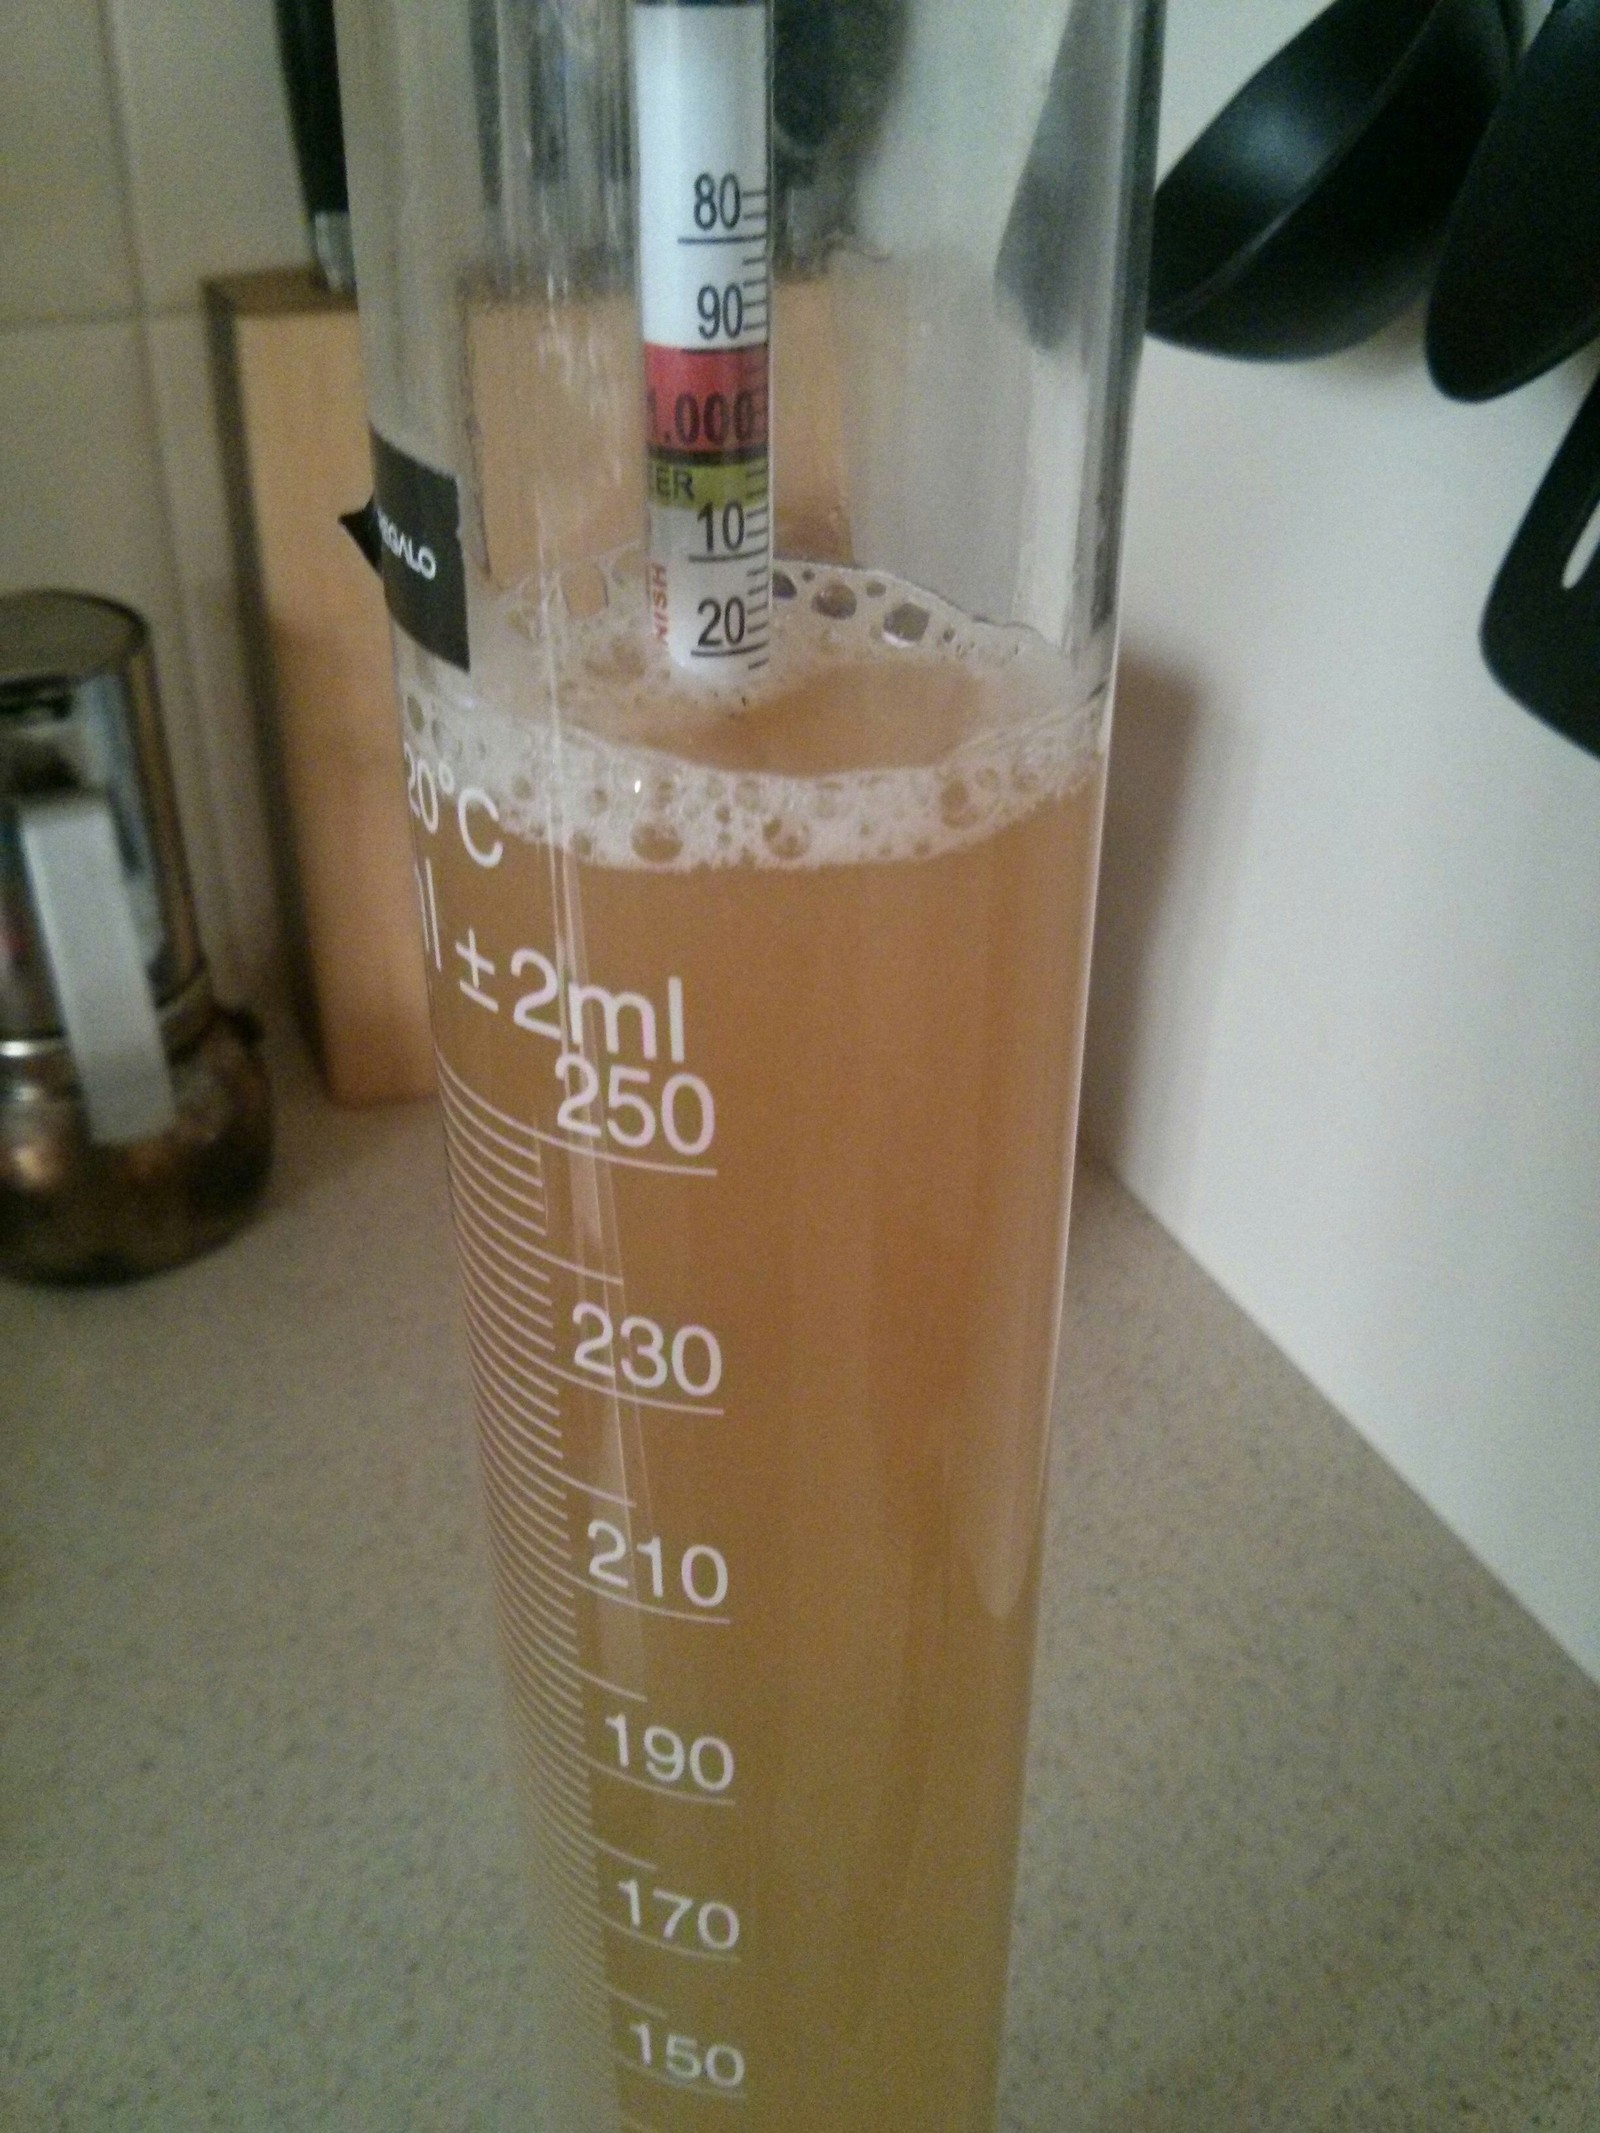
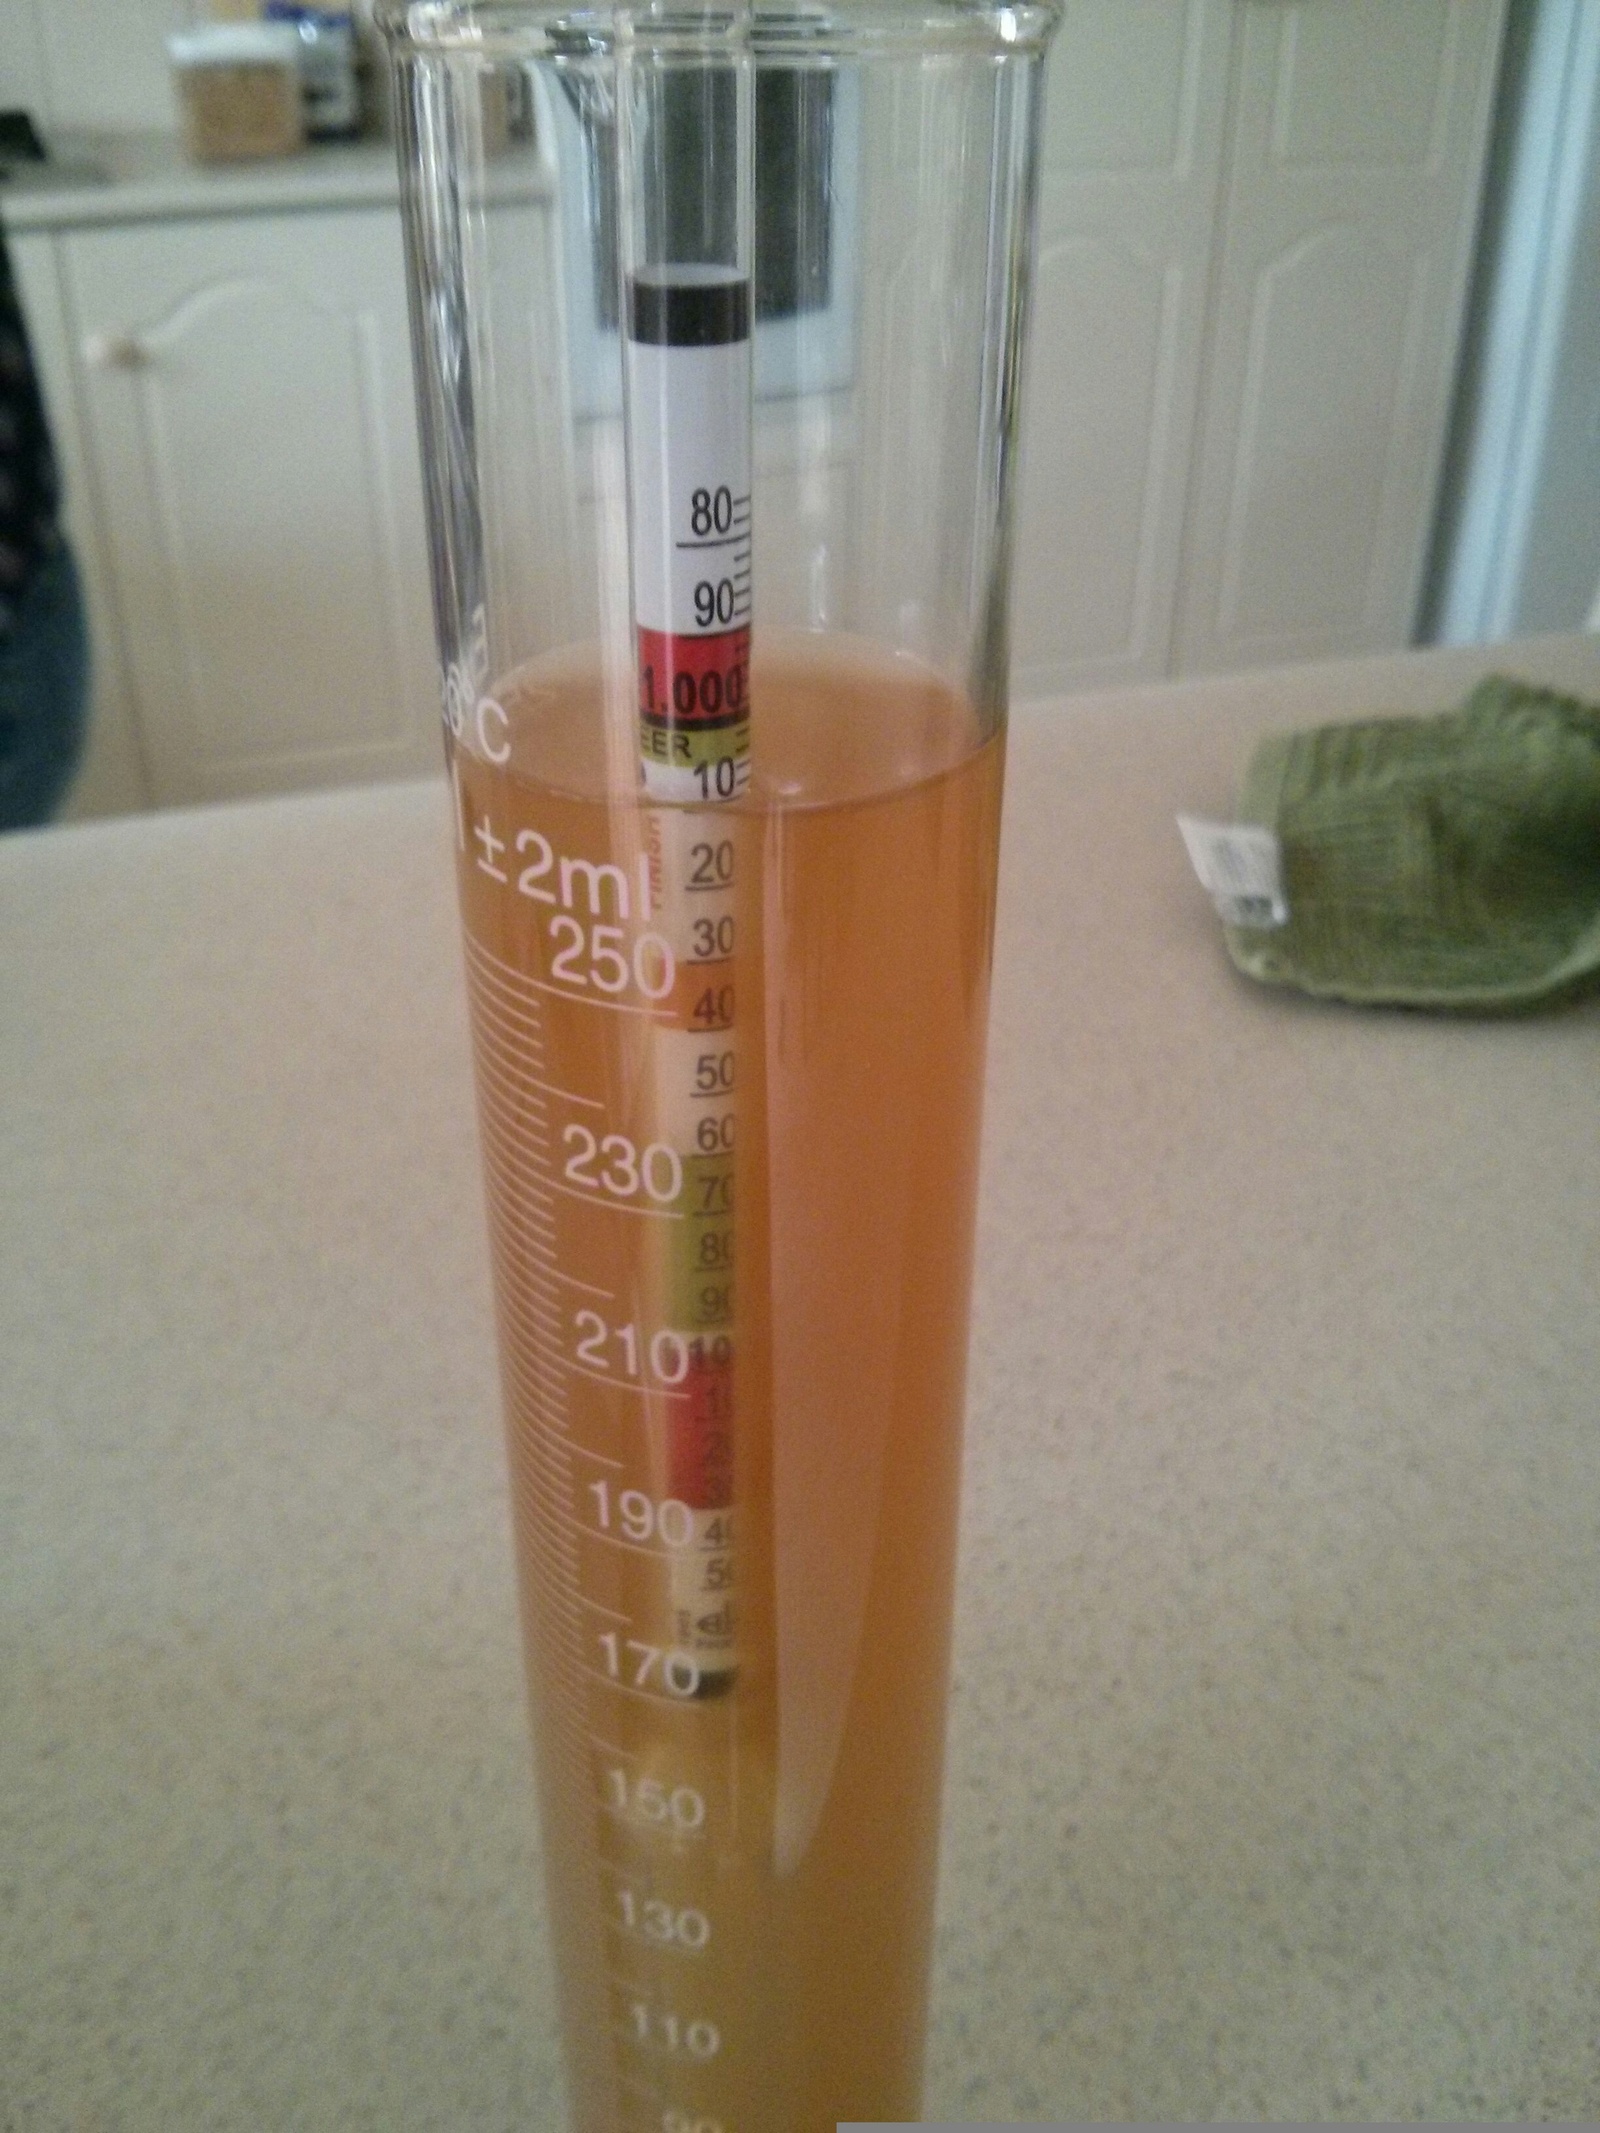
One of my daughters helped me bottle this brew. We ended up almost exactly 30 full 740mL PET bottles (22L of beer) and batch primed with 184g of white sugar dissolved in about 200mL of boiling water. Final gravity (prior to bulk priming) was 1.008 (see below), quite a bit drier than I would have expected.

Final Gravity Prior to Bottling

Final Gravity Prior to Bottling

Dual SHA256 / SHA1 Windows App Code Signing

I wrote about digitally signing programs for Windows a few years ago. Microsoft announced last year that windows would no longer trust files signed with the SHA-1 algorithm after 1 January 2017. This causes some problems with older operating systems (like XP SP2 and Vista) as they do not support the SHA256 algorithm for certificates used to sign programs/apps. To maintain compatibility with ealier versions Microsoft suggests dual signing with both the SHA1 and SHA256 certificates. It turns out my certificate (from Comodo and issued in mid-2015) supports both the SHA1 and SHA256 algorithm so it’s not a big hassle for me. However, some older certificates (that have not expired) may need to be re-issued by the issuing authority, some certificate issuers such as K-Software are issuing replacements for free.

Here’s what I had to do to sign my EXE files with both SHA1 and SHA256 versions of my certificate.

1. Download an up-to-date version of the signtool.exe file from Microsoft. Such as this one from the Windows 8.1 SDK.
2. My certificate was installed automatically by Comodo when I purchased it so it needed to be exported to a PFX file. You’ll need to know what the password for your certificate was when you purchased it. There’s a decent tutorial covering this process here.
3. Work out the new commands to dual sign your EXE files. In my case they look something like this.

//Code sign with SHA1
signtool.exe sign /f "c:\path\to\pfx-file\my-pfx-file.pfx" /p mypfxpassword /t http://timestamp.comodoca.com /v c:\Path\To\File\somefile.exe

//Code sign with SHA256
signtool.exe sign /f "c:\path\to\pfx-file\my-pfx-file.pfx" /p mypfxpassword /fd sha256 /tr http://timestamp.comodoca.com/?td=sha256 /td sha256 /as /v c:\Path\To\File\somefile.exe

It’s important to use the /fd and /td switches on the second call to ensure both the file and date/time stamp are SHA256 signed. I actually wrote a little batch file to automate the dual signing of files. I call the file from my various build scripts to sign both my program executables and installers. Here’s that file:

@echo off
echo ************************************************ 
echo Running %0
IF %1=="" GOTO InvalidParameter
IF not exist %1 goto InvalidFile  
echo Signing %1
echo Signing with sha1

"d:\code signing 256\signtool.exe" sign /f "c:\path\to\pfx-file\my-pfx-file.pfx" /p mypfxpassword /t http://timestamp.comodoca.com /v %1

echo Signing with sha256
"d:\code signing 256\signtool.exe" sign /f "c:\path\to\pfx-file\my-pfx-file.pfx" /p mypfxpassword /fd sha256 /tr http://timestamp.comodoca.com/?td=sha256 /td sha256 /as /v %1
echo Signing completed Successfully
goto eof

:InvalidParameter
echo You must pass this script a file to sign
goto eof

:InvalidFile
echo %1 does not exist
goto eof

:eof
echo ************************************************ 

You can easily check if you’ve dual signed correctly from within Windows 10 by right clicking on your signed EXE file, selecting Properties and then clicking the Digital Signatures tab. If it’s done right it should look something like the screen below. Note that both the SHA1 and SHA256 certificates are present.

Dual Code Signed EXE File

Dual Code Signed EXE File

Copy Element to Clipboard Using Javascript

Over the years I’ve built a web based system that controls most of the sales and support aspects for my software. This includes tracking sales, editing sales, supplying customers with registration keys, prompting them to renew support, and so on. There’s also a search interface that allows me to find customer sales details, registration keys, and to check if they have current support. I use this search interface multiple times a day and when I need to find a registration key or need to remind a customer that their support has expired the system outputs the email text I need to send to the customer to the browser window. Then I select it, and paste it into my emails.

This morning I thought it would be really neat if I could cut out the select and copy steps and have JavaScript copy it into the clipboard for me. Last time I checked this (5 years ago) it wasn’t possible without Flash. Now it turns out you can use the Web API that most modern browsers support to do it.

I wrote this little JavaScript function that I can pass a HTML element ID to and it copies the contents to the clipboard.

function copyToClipboard(elem)
{
	//create a new range to hold the DIV to copy
	var range = document.createRange();
	//select the not containing the element to copy
	range.selectNode(elem);
	//clear the current selection
	window.getSelection().removeAllRanges();
	//add the selected range to the current selection
	window.getSelection().addRange(range);
	//run exeCommand to copy 
	document.execCommand('copy');
	//clear the selection
	window.getSelection().removeAllRanges();
}

The key here is the document.execCommand(‘copy’) call which sends the contents of the element to the clipboard so I can paste it into my email tool. Triggering the function is pretty simple with something like this:

document.getElementById('copy-link').addEventListener('mousedown',copyToClipboard("element-id"));

I found a couple of other solutions that copied to the clipboard by copying the element contents to temporarily created <textarea> but the issue with this was that the HTML formatting was not copied. I needed this so that my support emails maintained my standard CSS styling.