Category Archives: WordPress

Last updated by at .

Woocommerce Product to eBay Listing

It’s always handy to be able to easily list up WooCommerce products on eBay. I believe there are (mostly commercial) plugins that can automagically list items on eBay but in my case the products have a lot of custom meta data and needed a significant amount of logic applied to the product data before putting it up on the ole’ bay of E. So, time to dust of some of my HTML table coding kung-fu and develop something to suit my application.

1. Building the eBay template

eBay uses some sort of ancient HTML parser for it’s listings. It only works with very basic CSS and you’re stuck doing layouts using tables. It also doesn’t like whitespace anywhere in the HTML so you need to minify your carefully hand-coded layout just to get eBay to render it correctly. This of course turns it into a compacted unreadable mess so making changes is a painful loop of code change -> minify result -> upload to eBay and check layout -> rinse and repeat. You also have to remember that eBay doesn’t allow javascript in their listings, and you can’t have any external links other than images. While you’re building your template you’re going to want to sprinkle it with template codes that will be replaced by WordPress when you create your eBay listing HTML. I used codes like <%item_title%>, <%item_description%> and <%item_image%>. So a basic template could be as simple as this:

<h1><%item_title%></h1>
<%item_image%>
<p><%item_description%></p>

Once you’ve constructed your template you’ll need to put it somewhere that WordPress can find it. I suggest your child theme folder is the best location, which in my case is /wp-content/themes/storefront-child//

2. Write the PHP Code

Where you put the code to generate your eBay listing an fill your template is up to you. In my case, I’m using the Storefront theme and most of the custom meta data I use is pulled and displayed on the product description tab. So, I decided that the best place for the store admins to generate the eBay listing would be on the store listing page for the product in question. Basically I need the system to be available when the admins are actually logged into WordPress, as a result we’ll need a conditional button that will get the HTML we require for our eBay listing. Then we’ll need a way of generating the HTML, and finally a way getting the HTML into the clipboard so it can be pasted into the eBay listing manager.

The product description tab in the Storefront theme is available in /wp-content/themes/storefront/woocommerce/single-product/tabs/description.php. You can just drop a copy of this file in the same folder in the child theme and start working on it. You can find a cut-down copy of my code below, I’ve tried to comment it as thoroughly as possible.

<?php
/**
 * Description tab
 *
 * This template can be overridden by copying it to yourtheme/woocommerce/single-product/tabs/description.php.
 *
 * HOWEVER, on occasion WooCommerce will need to update template files and you
 * (the theme developer) will need to copy the new files to your theme to
 * maintain compatibility. We try to do this as little as possible, but it does
 * happen. When this occurs the version of the template file will be bumped and
 * the readme will list any important changes.
 *
 * @see 	    https://docs.woocommerce.com/document/template-structure/
 * @author 		WooThemes
 * @package 	WooCommerce/Templates
 * @version     2.0.0
 */

if ( ! defined( 'ABSPATH' ) ) {
	exit; // Exit if accessed directly
}

global $post;

//$heading = esc_html( apply_filters( 'woocommerce_product_description_heading', __( 'Description', 'woocommerce' ) ) );

?>

<?php if ( $heading ): ?>
  <h2><?php echo $heading; ?></h2>
<?php endif; ?>
<?php
    /*
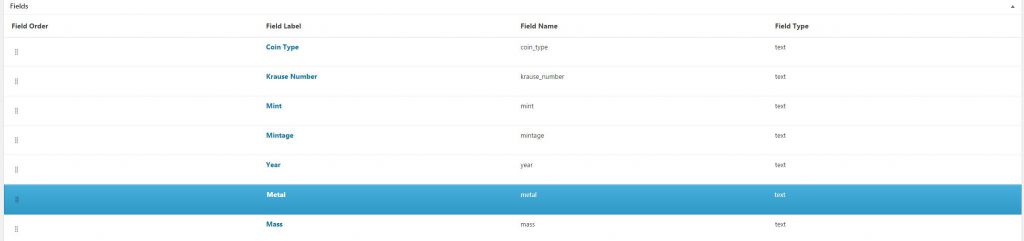
    *get custom meta data, using the Woocommerce Custom Fields Factory custom fields can be pulled using wccap_field_name
    */
    $custom_meta1=get_post_meta( $post->ID, "wccaf_custom_meta1", true );
    $custom_meta2=get_post_meta( $post->ID, "wccaf_custom_meta2", true );


    $product_information='';    
    
    if (strlen($custom_meta1)>0)
        $product_information.='<tr><td class="information"><strong>Meta Field 1:</strong></td><td class="information">'.$custom_meta1.'</td></tr>';
    if (strlen($custom_meta2)>0)
        $product_information.='<tr><td class="information"><strong>Meta Field 2:</strong></td><td class="information">'.$custom_meta2.'</td></tr>';

?>
<div style="width: 80%; float:left">    
<?php 
    
    /*
     * This is the administrator dependent code.  We only want to include the javascrpt and generate the eBay HTML when
     * and administrator is logged in.  Firstly, putting in a bit of javascript to copy the content of a div to the clipboard
     * and displaying a button the user can click to the copy the HTML to the clipboard.
     */
    
     /* if the administrator is logged in */
    if (current_user_can('administrator'))
    {
?>
<script type="text/javascript">
function copyToClipboard(element_id) {
  var input_placeholder = document.createElement("input");
  input_placeholder.setAttribute("value", document.getElementById(element_id).innerHTML);
  document.body.appendChild(input_placeholder);
  input_placeholder.select();
  document.execCommand("copy");
  document.body.removeChild(input_placeholder);
}   
    </script>
    
    <button class="button" onclick="copyToClipboard('ebay');">eBay HTML to Clipboard</button>
    <?php        
    }
    /*
     * Display the custom product information
     */
    if (strlen($product_information)>0)
    {
    ?>   
        <table class="information"><?php echo $product_information;?></table>
    <?php    
    }

    the_content(); 
    
    /*
     * So we're done displaying the production information, now if the adminsitrator is logged in
     * we can go ahead and generate the eBay HTML and load it into a div so it can be copied to the 
     * clipboard and used on eBay.
     */
    if (current_user_can('administrator'))
    {
        /*
         * Load the eBay template.  It's been uploaded to /wp-content/themes/stirefront-child/
         */
        $ebay_template=file_get_contents(get_stylesheet_directory_uri()."/ebay-template.htm");
        /* get the item title */
        $item_title=the_title( '', '',false );
        /* get the item description */
        $item_description="";
        
        if (strlen($product_information)>0)
        {
            $item_description='<table class="information">'.$product_information.'</table>';
        } 
 
        /*get the item image */
        $item_image="";
        
        @$image = wp_get_attachment_image_src( get_post_thumbnail_id( $loop->post->ID ), 'single-post-thumbnail' );

        @$item_image=$image[0];
        
        if (strlen($item_image)>0)
        {
            $item_image='<img src="'.$item_image.'">';
        }
        /*replace the template fields with the values we need*/
        $ebay_template=str_replace("<%item_title%>",$item_title,$ebay_template);       
        $ebay_template=str_replace("<%item_description%>",$item_description,$ebay_template); 
        $ebay_template=str_replace("<%item_image%>",$item_image,$ebay_template);
        /*now put to the filled ebay tempalte into a hidden div so it can be copied to the clipboard later*/
        <?php
        <div id="ebay" style="display:none"><?php echo $ebay_template;?></div>
        ?>
    }
    

?>
</div>  

There’s some key things to note here:

  • I’m using javascript to copy the HTML to the clipboard when the user clicks a button. The method used to copy to the clipboard using javascript is covered here.
  • I’m using the WooCommerce fields factory to record custom meta data against my products. You may be using some other method so the way you’ll pull your custom data may vary.
  • The eBay html, copy to clipboard button, and javascript is only injected into the page when the administrator is logged in. This is accomplished using the current_user_can('administrator') call.
  • The eBay template can include any number of template fields. You could include dates, other custom meta data, or anything really. However, remember that eBay frowns on external links and including javascript. Also, I’d suggest keeping your boilerplate text like terms and conditions in your template file rather than putting them into WordPress. They’ll be easier to maintain there.

Random Notes for Setting up a New Ubuntu LAMP Server on Linode

This is the first entry written on the new home of this blog, a 1GB Linode server. I moved it here from a Pair account that I am in the process of closing. The server is running Ubuntu Server 16.04 LTS, Apache, MySQL, and PHP 7.

Using /srv/www as Web Root

It looks like Apache defaults to using /var/www as the web root. I prefer using /srv/www. To enable this open up /etc/apache2/apache.conf, comment out the section and uncomment the section. Make sure to change the AllowOverride directive to All or .htaccess and mod_rewrite won’t work.

Getting mod_rewrite to Work

You need to make sure that the AllowOverride directive is setup as per above. Then just enable the mod with a2enmod rewrite.

Installing PHP7

PHP7 is installed fairly easily with sudo apt-get install php7.0 php7.0-fpm php7.0-mysql.

Permissions for WordPress

When first installing WordPress make sure to

sudo chown -R www-data:www-data /srv/site-root/

After installation set permissions on folders and files using:

find . -type d -exec chmod 775 {} \;
find . -type f -exec chmod 644 {} \;

Note that 775 is used because we need www-data and a ftp user to be able to modify the WordPress install.

Then take ownership of the whole folder again with:

sudo chown -R ftp-user:ftp-user /srv/site-root/

And give ownership of wp-content to Apache with:

chown -R www-data:www-data /srv/site-root/wp-content

And secure wp-config.php with:

chmod 600 /srv/site-root/wp-config.php

Setting up a MySQL Database and User

It like to have a user for each WordPress install rather than using some sort of global user. It’s done fairly easily with:

create database database_name;
create user user_name@’localhost’ identified by ‘somepassword’;
grant all privileges on database_name.* to user_name@’%’ identified by ‘somepassword’;
grant all privileges on database_name.* to user_name@localhost identified by ‘somepassword’;
flush privileges;

Zipping a WordPress Install

Moving a WordPress install from Pair to Linode involved zipping up the install folder, transferring it via SFTP to the new server, and unzipping it. This is done with:

tar -zcvf somesitename.tar.gz somesitename/

And extracting with:

tar -xvzf somesitename.tar.gz

The extraction will create the folder to put the contents in.

Basic Process of Moving Site

  1. Zip up WordPress install folder.
  2. Dump database using MySQL Dump or phpMySQL. Remember to add use database_name; to start of MySQL Dump file.
  3. Transfer install folder and MySQL dump to new server using SFTP.
  4. Create new database and user. Import data to database using something like mysql -uroot -ppassword < mysql_dump.sql
  5. Unzip WordPress tar.gz file to /srv.
  6. Edit the /srv/domain_name/wp-config.php file to enter new database details and login.
  7. Create new /srv/domain_name-logs/ folder for Apache logs and set www-data as the owner.
  8. Set permissions on WordPress folders as covered earlier.
  9. Make entry into /etc/hosts file for 127.0.0.1 site_name.
  10. Create /etc/apache2/sites-available/site_name.com.conf file making sure to set the web root and log file path correctly.
  11. Enable the site with a2ensite site_name.com.conf.
  12. Test by setting your local machine’s hosts file for the domain to the server IP address.
  13. Setup the new DNS Zone on Linode for the site.
  14. Adjust the Name Servers at the domain registrar for the domain.
  15. Wait for the DNS records to propagate!

WooCommerce – Custom Product Fields and WooCommerce Fields Factory

WooCommerce does have ‘attributes’ available for products but like most things in WC these are tailored for users selling clothing and various other consumer products. In my application each product is unique and once sold gone forever. Each product has common characteristics though, such as year of manufacture, metal it is made from, and where it was manufactured. As a matter of course the user of the WooCommerce store wanted to define a set of characteristics that would be entered when a new product was created and then wanted those characteristics displayed in the product listing. A good solution was arrived at through the use of the WooCommerce Fields Factory plugin and modifying the Storefront Single Product->Tabs->description.php template.

The WC Fields Factory plugin allows you to add custom fields to your WooCommerce products. It has the added benefit of allowing you to display those fields on the admin side where they can be edited at the product level by your shop admins. Nifty. In my application I created a group of Admin Fields called “Coin Attributes” and then populated the group with the fields that the customer wanted for their products.

Once that was done and I made sure to check the Hide in Product Page and Hide in Cart & Checkout Page for each field. Now when I add a product I see this in the General tab for each product:

So now we can store the data with each product as needed. The next step is to make sure the data displays as required for products. The key is that we only want the data field to display if there’s a value set. To do that we just need to do a bit of tweaking to the Storefront Single Product->Tabs->description.php template. We do that by making a copy of it into the /woocommerce/single-product/tabs folder of our child theme. In our case we just wanted to display the data in a table. So the PHP code required looked like this:


<?php
    //get the custom field data using the get_post_meta function.  All WC Field Factory fields are prefixed with wccaf_ and then the field name
    $coin_type=get_post_meta( $post->ID, "wccaf_coin_type", true );
    $krause_number=get_post_meta( $post->ID, "wccaf_krause_number", true );
    $mint=get_post_meta( $post->ID, "wccaf_mint", true );
    $mintage=get_post_meta( $post->ID, "wccaf_mintage", true );    

//display information only if there's a value set
    $coin_information='';    
    
    if (strlen($coin_type)>0)
        $coin_information.='<tr><td class="coin-information"><strong>Coin Type:</strong></td><td class="coin-information">'.$coin_type.'</td></tr>';
    if (strlen($krause_number)>0)
        $coin_information.='<tr><td class="coin-information"><strong>Krause Number:</strong></td><td class="coin-information">'.$krause_number.'</td></tr>';    
    if (strlen($mint)>0)
        $coin_information.='<tr><td class="coin-information"><strong>Mint:</strong></td><td class="coin-information">'.$mint.'</td></tr>';         
    if (strlen($mintage)>0)
        $coin_information.='<tr><td class="coin-information"><strong>Mintage:</strong></td><td class="coin-information">'.$mintage.'</td></tr>';  

    if (strlen($coin_information)>0)
        echo '<table class="coin-information">'.$coin_information.'</table>';
?>

Of course where exactly you echo out the data in the TABS template is up to you and determined by how your product pages are laid out.
 

WooCommerce – Display SOLD Instead of Price for Sold Products

If you’re using WooCommerce and selling one-off products you don’t necessarily want to use the default terminology for sold out products. You might want to hide the sold price and remove the WooCommerce “In Stock” messages that are better suited to sites selling t-shirts and so on. Removing the stock availability messages is simple enough using the woocommerce_get_availability filter.

    add_filter('woocommerce_get_availability', 'my_get_availability', 1, 2);

    function my_get_availability($availability, $_product)
    {
        $availability = '';
    }

Couldn’t be any simpler, just set the availability text to an empty string.  Presto chango those messages are gone.

Replacing the price with SOLD when a product is sold is almost as simple, it just requires hooking into a couple more filters.

    add_filter("woocommerce_variable_sale_price_html", "my_remove_prices", 10, 2);
    add_filter("woocommerce_variable_price_html", "my_remove_prices", 10, 2);
    add_filter("woocommerce_get_price_html", "my_remove_prices", 10, 2);
    function my_remove_prices($price, $product)
    {
        if (!$product->is_in_stock())
        {
            $price = "SOLD";
        }
        return $price;
    }

WooCommerce – Add Phone Numbers to Header of Storefront Theme

I happen to like web stores that have contact details in prominent locations so it’s useful to be able to add phone numbers to the header of a site using WooCommerce. In my particular application I’m using the Storefront theme.  Firstly you need a  bit of CSS in your child theme’s style.css file. Your widths might be different and I’ve adjusted the margin of the site-search div to compress things a bit.

.header-contact-details {
    width: 50.7391304348%;
    float: right;
    margin-right: 0;
    clear: none;
}

.site-search{
    margin-bottom:10px;
}

Then you can use the storefront_header action to insert some code into the header.  To set the priority of the insertion have a look at the storefront header.php file.  In  my case I wanted the new HTML in between storefront_product_search and storefront_primary_navigation_wrapper so I set the priority to land in between those two.


//add phone numbers to header

    add_action('storefront_header', 'storefront_add_header_phone', 41);

    function storefront_add_header_phone()
    {
        ?>

        <div class="header-contact-details" style="text-align:right"><p style="color: rgb(64, 48, 74);font-weight:600;font-size:20px;"><i class="fa fa-phone" style="color:rgb(155, 126, 230)"></i> 555 555 555 (AUS)  <i class="fa fa-phone" style="color:rgb(155, 126, 230)"></i> +61 555 555 555 (INTL)</p></div>
        <?php
    }

The code is pretty clear, I make use of the font awesome font set to have some pretty phone icons and colour them to match the rest of the site style. Of course there’s a little bit of CSS inline here that could be moved into the style.css file but for now it works and I am happy with that. Here’s the what the end result looks like:

WooCommerce – Receive Copies of Customer Emails

If a user is new to WooCommerce it can be a little confusing what emails a customer is receiving and exactly what events are triggering the delivery of emails. To help alleviate the problem it can be useful to deliver copies of all customer emails (see the WooCommerce Email Notifications screen below) to another email address so they can be monitored.

WooCommerce Email Notifications Screen

In this case the woocommerce_email_headers() filter is useful. It allows you to intercept the email header and inject your own custom headers of the same form used by the PHP mail function. In my case I was happy to include a CC email address so I used this code:

//
//Send copies of customer emails to someone@somewhere.com
//
add_filter( 'woocommerce_email_headers', 'copy_customer_emails_headers_filter_function', 10, 2);

function copy_customer_emails_headers_filter_function( $headers, $object ) 
{
    if ($object == 'customer_completed_order' || $object == 'customer_invoice' || $object == 'customer_note' || $object == 'customer_on_hold_order' || $object == 'customer_processing_order' || $object == 'customer_refunded_order') 
    {
        $headers .= "CC: Someone <someone@somewhere.com>" . "\r\n";
    }

    return $headers;
}

The code itself is fairly self explanatory. It checks the passed object and if it’s one of the customer notification emails then the “CC: Someone <someone@somewhere.com>” . “\r\n” string is appended to the email headers. That email address will now receive a copy of all the emails sent to a customer. Of course the customer will see the CC address in their emails so you could include a BCC address with something like “Bcc: Someone<someone@somewhere.com>\r\n”.

WooCommerce – Default Manage Stock and Sold Invidually Values

I’ve had the somewhat dubious pleasure of launching a new WordPress / WooCommerce site for an established collectables business. The site replaced an aging cart system, that was frankly a steaming pile. Almost every item sold by this business is unique so they wanted to default the values for Manage Stock to true and Sold Individually to true.

The WooCommerce Inventory Screen

It turns out the easiest way to do this is to add some javascript to the admin_enqueue_scripts action that checks the form elements we need checked. Poking about with the Chrome element inspector at the WooCommerce stock handling form told me we needed the _manage_stock and _sold_individually checkboxes ticked and to set a value in the _stock text field. Here’s the code I put in my child theme’s functions.php file.

//
//set default stock handling values
//

    add_action('admin_enqueue_scripts', 'wc_default_variation_stock_quantity');

    function wc_default_variation_stock_quantity()
    {
        global $pagenow, $woocommerce;

        $default_stock_quantity = 1;
        $screen = get_current_screen();

        if ( $pagenow == 'post-new.php' && $screen->post_type == 'product')
        {
            ?>
            <script src="//ajax.googleapis.com/ajax/libs/jquery/1.8.2/jquery.min.js"></script>
            <script type="text/javascript">
                jQuery(document).ready(function () {
                    if (!jQuery('#_manage_stock').attr('checked')) {
                        jQuery('#_manage_stock').attr('checked', 'checked');
                    }
                    if ('0' === jQuery('#_stock').val()) {
                        jQuery('#_stock').val(<?php echo $default_stock_quantity; ?>);
                    }
                    if (!jQuery('#_sold_individually').attr('checked')) {
                        jQuery('#_sold_individually').attr('checked', 'checked');
                    }

                });
            </script>
            <?php
        }
    }

The code itself is fairly simple. The javascript is injected into the document.ready function but only if we’re adding a new post and the post type is WooCommerce’s product post type. The appropriate checkboxes have their checked attribute set to true and the _stock field is set to a value of 1 if it’s currently zero. Simples!

wpDataTables Filters in WordPress

I’ve started using wpDataTables for data driven tables in WordPress. The ability to have a table linked to an Excel spreadsheet is neat and the automagically formatted tables that use the jQuery Data Tables plugin are nice too. I needed to tweak few things though. First, center align the table titles. Easy enough using the wpdatatables_filter_rendered_table

add_filter('wpdatatables_filter_rendered_table','my_filter_rendered_table');

function my_filter_rendered_table( $table_content, $table_id )
{
	$content=$table_content;
	$content=str_replace('<h2>','<h2 style="text-align:center;">',$content);
	return $content;
}

The second issue I was having was with URL Link Columns. These are driven from an Excel spreadsheet by separating the URL and the link text with two pipe (|) characters. Something like:

http://someniftysite.com||Nifty Link Text

In the case of the data I was displaying some of the cells would need links and some wouldn’t. Trouble was wpDataTables appears to render every value in a URL Link Column as a link whether you pass it a URL or not. In fact, it uses the Link Text as the URL if you omit the URL. Instant broken links, yuck. No problems, I thought initially, I’d just use the provided wpdatatables_filter_link_cell filter to grab the URL links, parse out the URL and the link text and just return the link text if the URL was invalid. Pretty easily done with a bit of regex like:

	$url=preg_match('/href="(.*?)"/', $link, $url_matches);
	
	$link_text=preg_match('/>(.*?)<\/a>/', $content, $link_text_match);

It worked beautifully for the Link Text but rather frustratingly preg_match stubbornly returned 0 (no match) for the URL no matter what I tried. Even when I VAR_DUMP’ed the link it appeared that the preg_match should work. But it didn’t. In the end I used substr to echo back the link one character at a time and hey presto, wpDataTables was wrapping the href parameter in a single quote rather than a double quote. When I echoed the value to output using VAR_DUMP the browser (un)helpfully replaced the single quotes with double quotes. Grrrr. Anyway here’s the code that worked:

add_filter('wpdatatables_filter_link_cell','my_filter_link_cells');

function my_filter_link_cells($link)
{
	$content=$link;
		
	$url=preg_match("/href='(.*?)'/", $link, $url_matches);
	
	$link_text=preg_match('/>(.*?)<\/a>/', $content, $link_text_match);
			
	if (strpos($url_matches[1],"/")===false || strpos($url_matches[1]," ")!==false)
	{
		$content=$link_text_match[1];			
	}
	
	return $content;
}

Now my tables displayed links for values that actually had a proper URL and just text for those that didn’t. Yay.

wpDataTables seems pretty good, it isn’t free but $29 seems like a decent price for something that has worked pretty much exactly as advertised and has a tonne of features. Recommended.

Putting the Search Box into the Primary Menu in the Virtue Theme

I used the free Virtue theme in a recent contract and wanted to put the WordPress search box into the primary navigation menu. That was done easily enough by putting this into the child theme functions.php file:

function add_search_form_to_menu($items, $args)
{

    if( $args->theme_location != "primary_navigation" )
        return $items;

    return $items . '<li class="my-nav-menu-search">' . get_search_form(false) . '</li>';
}

However, the site I was building needed a private area for members and I’d been tinkering with the WordPress Access Control Plugin (WPAC) to accomplish that. The plugin allows you to display different menus to users who are logged in and those who are not. One menu (called Top Menu) was setup by WPAC to display as the Primary Navigation for users who were not logged into WordPress. While another (I called Top Menu – Private) was setup to display to members only. Obviously I wanted the WordPress search box to display on that menu too so I had to modify the above PHP slightly to allow for the private menu. Here’s how that worked:

function add_search_form_to_menu($items, $args)
{
    if( ($args->theme_location != "primary_navigation") && ($args->theme_location != "primary_navigation_wpac") )
        return $items;

    return $items . '<li class="my-nav-menu-search">' . get_search_form(false) . '</li>';
}

So there you have it. How to get the WP search box to display in the primary navigation menu when using the Virtue theme, and when using the Virtue Theme with the WordPress Access Control Plugin.

Redirecting Adwords by Operating System

My desktop software products run on Windows. I spend a significant amount each month on Google Adwords to drive traffic to my websites, which is problematic as Adwords does not allow you to filter traffic by operating system. It does allow you to reduce bids on Mobile traffic but it bundles Desktop/Full Sized Tablet with Browser traffic into one segment. In the last few years the amount of non Windows OS traffic I receive via Adwords has grown steadily and now makes up slightly more than 50%. I’ve been struggling for a while to work out what to do with this traffic as clearly users from non Windows devices cannot use my software. Yesterday at 4AM I hit on a possible solution and spent the day implementing it. Basically I’m now intercepting the clicks on my “Download Now” buttons/links, checking the client operating system, and if it’s not a version of MS Windows then redirecting them to a page targeted at my online SAAS products. Those products WILL work on their non Windows devices. Sure, it’s an obvious thing to do but I work in isolation and sometimes it takes me a while (years) to reach the “obvious” solution to a problem.

Here’s how I did it:

1) Installed the PGWBrowser plugin for jQuery. This plugin allows you to detect the OS, browser and viewport of web clients.
2) Enabled the plugin in WordPress by enqueuing the JS file:

wp_enqueue_script('pgwbrowser',get_stylesheet_directory_uri().'/js/pgwbrowser.min.js',array(),false,true);

For non WordPress pages (my Adwords landing pages) I used the following (making sure it came after loading jQuery):

<script type="text/javascript" src="/wp-content/themes/Divi-child/js/pgwbrowser.min.js"></script>

3) Now I adjusted the onclick call on my download buttons. I know that using the onclick event like this is archaic but I’ve been doing it this way since 2004 and it works nicely so I’m not changing it! I use this event to redirect users who download the software to a “Download Complete” page that allows me to count downloads. Here’s what the HTML/JS looks like now:

<a class="button_class button_icon_download" href="/downloads/some_file_name.exe" onclick="SetUpRedirect('some_file_name.exe',event)">

You can see I’ve passed the file name to be downloaded to the JavaScript function as well as the event (click) object.

4) The final step was to adjust the SetUpRedirect JS function to accomplish my goals. Here’s what that looks like now:

function SetUpRedirect(destination,event_object)
{
		var pgwBrowser = jQuery.pgwBrowser();
		var os=pgwBrowser["os"];
		var os_name=os["name"];
		os_name=os_name.toLowerCase();

		if (os_name.indexOf("windows")>-1)
		{
			setTimeout(function(){window.location='http://'+location.hostname+'/download-file/?file='+destination;},3000);
			return true;		
		}
		else
		{
			event_object.preventDefault();
			location.href="http://"+location.hostname+"/some-landing-page/?file="+destination+"";
		}
	}

That’s all pretty self explanatory. We’re making use of the PGWBrowser plugin to get the Operating System of clients and checking if it contains “Windows”. If it does those users get redirected to the download success page as usual. However, if they are not Windows users we use the jQuery preventDefault method on the event object to stop those users downloading the trial version of my software. They are then redirected to another landing page that says something like “hey we noticed you’re using a non Windows device, why not try out our spiffy web-based product instead?” Neat.