Monthly Archives: July 2013

Last updated by at .

Installing Ubuntu on a Mac Mini

A I mentioned in a previous post we had some power surge issues here recently. And our file server, a 2011 vintage Mac Mini called “Einstein” was one of the victims of the the surge. I don’t want to talk much about the accredited Mac repair shop that tried to repair the Mac Mini. But suffice to say, they didn’t. They did replace one of the HDDs and tinker with it a bit. And I gave them some money for doing so. The result of this was that three weeks after the power surge I was lighter in the pocket and had a Mac Mini that supposedly worked fine yet would crash repeatedly when sitting on the desk in my office.

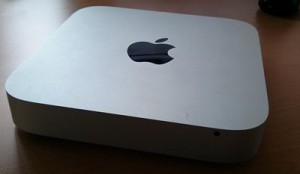
Einstein - A 2011 Mac Mini with 2GB of RAM and dual 500GB Hard Disks

Einstein – A 2011 Mac Mini with 2GB of RAM and dual 500GB Hard Disks

I needed the Mac Mini working or failing that, something else. Something to act as a file server and something with a Unix based operating system on it so I can run CRON jobs and do various other things. So, I decided to have one last go at getting “Einstein” working. And this time I decided on something drastic. Ditch MacOS 10 and try installing Linux (namely Ubuntu server) on it. There were three reasons for this. Firstly, the Mac repair place assured me they could find nothing wrong with the hardware in the computer so presumably there was something wrong with the OS. Second, I am moderately comfortable with Ubuntu server because it’s what’s running on my managed web servers. And finally, I hated MacOS 10 Server with a passion. The GUI is awful and I always found myself dropping to the command line to do things.

So, no guts, no glory. Let’s install Linux on the Mac.

1. Create a Bootable USB Drive

Einstein is a dual 500GB HDD Mac Mini with 2GB of RAM and no optical drive. So, the only sensible way of getting an OS on it was via a USB stick. I grabbed a spare 8GB stick, downloaded Rufus and created a bootable stick using the ISO I had of Ubuntu 12.04 LTS. Putting the stick into the back of the Mac I held down the left ALT button on my keyboard and booted it up and was shown the boot device menu. There I could see both internal hard disks which were setup in a bootable RAID 1 array. But no USB stick. Bother. A bit of Googling later and I’ve found out Mac Mini’s don’t have BIOS they have UEFI to link their software and hardware and therefore they require a bootable USB stick to be setup for a UEFI computer.

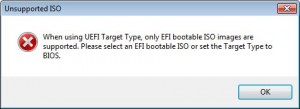
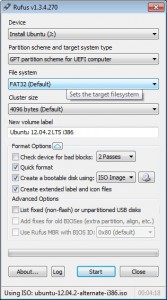
Rufus provides a few options for the partition scheme and the target computer type, one of which is GPT Partition Scheme for UEFI computer. I selected this option and tried to build the USB stick again but Rufus complained with the following message:

“When using UEFI Target Type, only EFI bootable ISO images are supported. Please select an EFI bootable ISO or set the Target Type to BIOS”

Rufus Doesn't Like the Ununtu 12.04 ISO

Rufus Doesn’t Like the Ununtu 12.04 ISO

Off to the Ubuntu website I go and download Ubuntu Server 13.04 which it says supports UEFI computers. I rebuilt the USB stick, rebooted the Mac to the boot device menu and hey presto there’s my USB stick! Victory!

My Rufus Settings

My Rufus Settings

2. Boot the Mac Mini to the boot device menu

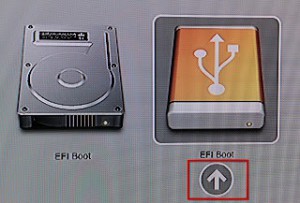
This is simple, just boot up the Mac Mini and hold down the left ALT key. After a brief pause you’ll be shown the boot device menu which looks something like that shown below.

Mac Mini Boot Device Menu

Mac Mini Boot Device Menu

The EFI boot option was my USB stick. I clicked on that and booted into the Ubuntu installer.

3. Install Ubuntu Server

I won’t take you through the entire process of setting up Ubuntu server on the Mac. I encountered a few snags on the way that were almost all to do with getting the two 500GB disks working in a RAID 1 format. The Ubuntu install script does an admirable job holding your hand through the raid setup process (this is the first time I’d ever done it) but there were a few hiccups along the way.

The first, was that one of the disks just wouldn’t be setup with a UEFI boot partition. It just refused. I don’t know if some HDD’s only allow MBR boot partitions or not. But one of these HDDs just got persnickety and refused to cooperate. So, after much fiddling about I ended up with the following partitions on the drives.

HDD1 (/dev/sda)

100 MB UEFI Boot Partition
50GB ext3 partition mounted as root
400 GB raid partition
50 GB swap partition

HDD2 (/dev/sdb)

400 GB raid partition
100 GB ext3 mounted as /usr

I setup /dev/md0 as my raid array using the two 400GB partitions as the members of the array and mounted /dev/md0 as /srv.

This solution isn’t ideal because if /dev/sda goes down I won’t be able to boot the Mac as I couldn’t make /dev/sdb bootable. But that’s not the end of the world. I can still boot it up via my handy USB stick and get the data off of the drive onto an external HDD if needed.

4. Give the Mac a Fixed IP

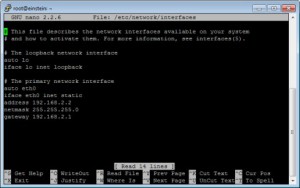
Now I needed to get Einstein on the network. I wanted to give it a fixed IP. So I used:

sudo nano /etc/network/interfaces

And changed the settings for eth0 from dhcp to the following:

Einstein's Interfaces File in a PuTTy Session

Einstein’s Interfaces File in a PuTTy Session

Then it was a matter of restarting the networking process with:

sudo /etc/init.d/networking restart

5. Setup a Simple Windows Share

As part of the install process for Ubuntu I’d chosen to install Samba. Now it was just a matter of setting up a simple share of my RAID array to allow the Windows PC’s on my network to access Einstein. Here’s how I did that:

sudo nano /etc/samba/smb.conf

Then change

workgroup = myWorkGroupName
security = user

And add this entry at the bottom of the file:

[share]
comment = Einstein File Share
path = /srv/windows-share/
browsable = yes
guest ok = yes
read only = no
create mask = 0777

Save those changes, exit the text editor and then enter the following:

mkdir -p /srv/windows-share/
chown nobody.nogroup /srv/windows-share/
restart smbd
sudo restart nmbd

Once I’d done that it was simply a matter of going to a Windows PC and typing:

\\Einstein\

into Windows explorer and I could see the new shared drive.

6. Setup a GUI for Ubuntu Server

Next I decided to install a GUI for the new server. And surprised I was to read that only wimps have GUI’s on their servers. But hey, I am a wimp, and I like to have multiple terminals open. I went ahead and installed lightdm which is the default GUI and display manager for Ubuntu. I did it with this:

sudo apt-get install ubuntu-desktop

However, I experienced a lot of graphical glitches with this. Perhaps it’s not fully supported on the video card in the Mac. Who knows. I got around it by installing another display manager with:

sudo apt-get install xdm

When I started the GUI next time Ubuntu asked me if I wanted to use LightDM or XDM. I chose XDM and the GUI has worked fine ever since.

For those that are interested you can exit from the GUI using CTRL-SHIFT-F1. And if you want to restart the GUI just enter

sudo /etc/init.d/xdm start

Conclusions

I don’t trust Einstein just yet. It’s been up and running for 48 hours without issue but I don’t want to trust my files to it just yet. Right now it’s running some CRON jobs in tandem to my existing cobbled together file server. I’ve also got it syncing some files from my main PC to see how it goes doing that. I’ll let it do this for a week or so and use it to serve some live files for some of my less important tasks. Once I’m happy it’s working OK I’ll do a data integrity check on the files it’s holding. If it passes that then Einstein will be back in the good books and I’ll put it back into live operation again.

Other Useful Stuff

Here’s some other useful things I found out through this process.

To set the default text editor in Ubuntu (I can’t use vi or emacs) using:

sudo /usr/bin/select-editor

I know enabling su is a security risk but I got sick of typing sudo. So to enable su just use this:

sudo passwd root

New Tablet – Asus Google Nexus 7

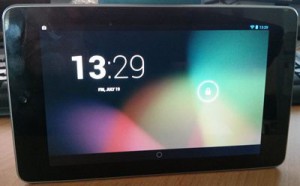
Google / Asus Nexus 7

Google / Asus Nexus 7

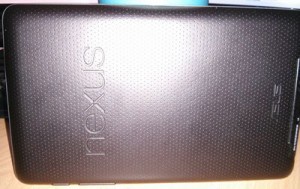
I’d been wanting another tablet for a while (I’ve had an iPad 1 for several years) and based on the good experiences I’ve had with my Google Nexus 4 phone I was quite happy to try out the equivalent Google tablet option. It just so happens that last week I walked past an electronics store with a hand-written sign on the door “Daily Special – Nexus 7 32GB $199 normally $279”. If ever a sign was a sign that I should adhere to the advice of a sign then that sign was it. In I went and bought myself a Google Nexus 7, manufactured by Asus and running Android 4.2.2 (Jelly Bean). You can see what the Nexus 7 looks like above. There’s a camera in there, but it is only 1.2 mega pixels so don’t expect anything special from it. The back of the unit is covered in a textured plastic material (see below) emblazoned with the Nexus and Asus logos.

Back of the Nexus 7

Back of the Nexus 7

Given that Android uses soft buttons at the bottom of the display the actual hardware controls are somewhat sparse. Just two buttons, a volume rocker and a power switch (see below) can be found at the top right side of the unit.

Volume / Power Buttons

Volume / Power Buttons

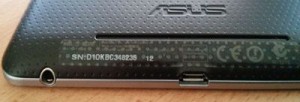
At the bottom of the Nexus you can find a mini USB port, a headphone jack and just round the back a cut-out for the internal speaker. You can see these below.

Headphones / USB / Speaker

Headphones / USB / Speaker

OK. So what’s it like? My first impressions are that it’s a much more manageable size that a 10″ tablet (like an iPad). I can mostly use the Nexus 7 one-handed and it’s quite comfortable to do so. The textured reverse of the unit is nice to grip onto and doesn’t get tiring if you’re using it for an extended period. Visually it’s inoffensive but if I had one comment it’s that the 7″ screen looks rather skimpy inside what is a wider than expected black frame. But I suppose there has to be somewhere to hang onto it!

Given that the tablet uses the same OS as my Nexus phone I settled into how the tablet works almost instantly. There’s some very minor differences in the way the Google app icons are grouped and the way the tablet information slider that is always available at the top right of the screen works. And the wider screen allows for more app icons across the bottom of the screen (they are lined up the side of the screen in landscape mode). In any event, the differences are minor and anyone who has used a device with a fairly vanilla install of Android 4.2.2 will be right at home. The software itself is quite responsive so whatever processor is in the Nexus is up to the job. If I had one quibble it’s that things just don’t seem quite as polished as they are on my 4 year old iPad. Scrolling isn’t quite as smooth, sometimes I need to poke at on-screen buttons more than once, and the location of the settings button in various apps seems to change with little rhyme or reason. Clearly the people looking after iOS run a much more rigid development system than the Android people.

There’s no native flash support in Android 4.2.2 so if you’re wanting to watch videos online you’re going to need to download a browser with Flash enabled natively (like Dolphin) or sideload Flash and install Firefox. But, even when I’d done that Flash support was flaky. For example, I could get SBS On Demand working but still haven’t had any luck with ABC iView.

I’ve had this unit for a week now and I’m happy with it at the price I paid. If I’d paid full asking price I’d be much less impressed (actually I wouldn’t have it at all). Recent media reports suggest tablets of this size are likely to see price drops in the near future so I’d hold out to get a Nexus 7 at a discounted price if possible. It’s ideal if you’re after a small form tablet, want to keep away from the Evil Apple Empire, and don’t want a tablet loaded down with pre-installed crap software. So what do I think of the Google Nexus 7? At the price, it’s hard not to like it. Go get one.

New IP Phone – Gigaset C610A IP

Our ISP offers a free VOIP service along with providing access to (pretty crappy) ADSL. We had an old VOIP box (an Open Networks 812L) sitting in a box that used to work but despite my best efforts I’ve been unable to get it working again. Cue my recent power problems and once I’d sorted those out I thought it was time to have one more go getting the 812L to work.

A couple of hours later and I’d failed. No matter what I tried I just couldn’t get into the web management console for the device because I couldn’t work out what the IP address of the device was. I dimly remember that the device had an in-built DHCP server so I even plugged it into a laptop in the hope it would give the laptop an IP address. Fail. Installed a port scanner and tried to determine the IP address that way. Fail. OK, pressed the hard reset button on the 812L…..and that did exactly nothing. So I gave up in disgust and consigned the unit to the bin.

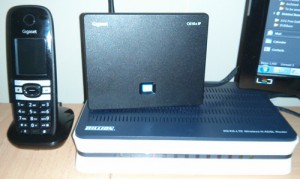
The next step was to spend 20 minutes reading some VOIP oriented forums and looking at the IP phones that my ISP supported. Based on what I’d read and what my ISP supported I decided on a Siemens Gigaset C610A IP. This is a DECT IP phone with a built in answering machine (that’s what the A in the model number means). It allows you to use two different VOIP lines AND the standard analog line. I bought one for about $190 (can anyone say Australian rip-off….they can be had for half this price in the USA) and a few days later the phone showed up. Here’s what it looks like on my desk:

The Siemens Gigaphone C610A IP Phone

The Siemens Gigaphone C610A IP Phone

The box the machine came in included the handset, the charging base for the handset, the base unit, a belt clip for the handset, some rechargeable AA batteries, two power units, a skimpy instruction manual and a CD of software they never expect anyone to use. The base unit plugs into a router and into the phone line. The handset / charger can sit anywhere I’d imagine. Setting up the unit was a doddle. Once I’d plugged the base unit into my router it grabbed an IP address and informed me via the handset that it wanted to download a firmware update. This was done in a few minutes. Then it was simply a matter of logging into the web management console of the phone and entering my ISP assigned IP phone number and passwords. 5 minutes later it was all done and I could make calls. The voice quality of which were excellent.

The handset seems to be nicely designed as does the software it runs. The handset offers much online integration to services like eBay, Facebook and news/weather services. I am not sure how much use these would be with the titchy little colour screen but I guess some people *might* use them. The unit also has the usual myriad selections for ringtones and message tones. There’s also the capability to assign different tones depending on the phone call source (for example from different VOIP lines and the analog phone lines). I’ve not spent too much time playing with this side of things though.

Given my recent run of bad luck with hardware this phone has been a pleasant surprise. I felt cheated somehow that it only took me 10 minutes to get it working and was sure it was going to be harder. But it wasn’t. So, the Gigaset C610A IP phone is, for ease of setup alone, highly recommended.

New UPS – APC Back-UPS ES700

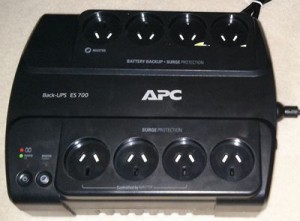
APC UPS ES700

APC UPS ES700

In light of my recent power surge woes I’ve gone ahead and bought a UPS. The chosen unit is an APC 700VA ES700. This unit comes with 8 plugs, 4 of which are surge protected and can run from battery power. The other four are just surge protected. I chose this unit because the capacity of 700VA should be enough to keep my file server, my router, my main PC and one monitor active for several minutes in the case of a power interruption. Long enough for me to save my work and gracefully shut down my file server and PC. The battery in the UPS is user-replaceable too which is handy a few years down the track when the battery is shot.

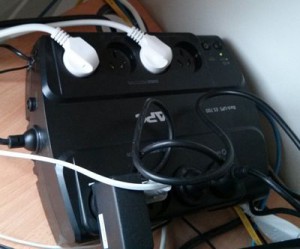
The unit was around $150 and weighs about 8 kilograms. It’s small enough to sit behind my monitors for easy access. The only real set up required was to connect the terminal for the battery and to charge it for 16 hours before usage. Once I’d done that I plugged my PC, a monitor, the router and file server into the UPS enabled plugs. The surge protected plugs were connected to a couple of powerboards that run the rest of my monitors, my partner’s PC, and the network printer. I can verify that the UPS works as advertised because the power happened to flicker on and off not 12 hours after I inserted it into my systems. The unit doesn’t make any noise when operating normally but I did note a hum when the unit was operating from the batter.

There’s a feature of the APC ES-700 that I didn’t use. One of the UPS enabled powerpoints can act as a master and three of the surge protected points can slave from this. When the master is off all power to the slaved powerpoints is stopped, allowing users to save on stand by current draw. This could be ideal if you wanted to use the UPS in your home theater. You could (for example) assign your TV as the master and slave your PVR and hifi system off of that. The documentation also mentions being able to tune the UPS for the current draw of your master device. Seems like a handy feature.

APC UPS ES700 In Use

APC UPS ES700 In Use

Power Surges, Dead Macs, and VirtualBox

Power Surges

It’s been something of a disaster here in the last 10 days. Things were going swimmingly until last Friday when the power flickered on and off. Normal the quality of power supply here is excellent and this is the first time the power had gone off in a while. All of my hardware (or so I thought) is plugged into surge protected power boards so I wasn’t too worried. My main PC came back up no problems as did the laptop, modem, network switch and everything else. But I couldn’t get a connection to the internet from any computer.

Dead Router

Several ADSL router reboots later and with the help of an old laptop I’d isolated the problem to being in my ADSL Modem/Router. It just failed to connect to the internet. OK, dead modem, At that point I was a bit baffled why it would be dead because the modem is plugged into a high quality surge stopping power board. Off to the computer shop I go and 30 minutes later come back with a Billion 7800 NXL router. I picked it because of the dual band WiFi and the capability of running an external USB device. Got that home, connected it to the ‘net without issue and then plugged the network cable from my network switch to the modem. And bang, down went the modem. Uh-oh. Well it turns out the network switch wasn’t plugged into a surge protector. So it was dead and doing weird things to anything connected to it. So, I pulled the switch out of the network and connected the various PC’s directly to the modem and everything came back online. Yay. Or not.

The Dead Mac Mini

The Dead Mac Mini

Dead Mac Mini

At this point I’d plugged in the Mac Mini Server with dual RAID disks which acts as a simple network file server and also runs a series of CRON jobs to perform rsync driven backups from various servers around the internet that I look after. The Mac had appeared to boot up OK. I say appeared because I don’t actually run this machine with a monitor. In fact the last time I had a monitor plugged into it was two years ago. The only way I can tell it’s alive is by a single LED on the front and whether or not I could access the shared directories we use every day. It turns out I couldn’t access anything from it. I couldn’t open a PuTTy session with it either. Anyway, to cut a long story short I had to find a spare monitor and keyboard and mouse to plug into it and see if I could log into the OS via the GUI. Turns out the Mac wouldn’t boot up reliably, would occasionally let me log in and then freeze, or would just freeze and the opening login screen. Bugger that’s dead too.

Emergency Remote Backups

At this stage I was getting nervous because there were no backups being done of anything anymore. I quickly installed an Ubuntu virtual machine in Virtual Box and got some jobs going to rsync my files down from various remote servers in the USA. There was a bit of a hassle getting the Ubuntu client to connect to shared drives on the Windows 7 Host but found this web page to be very helpful. Basically I created a directory on the Ubuntu client using:

sudo mkdir /media/share-name

And then mounted the VirtualBox shared folder using:

sudo mount -f vboxsf shared-folder-name /media/shared-name

I wanted the mount to be persistent and I couldn’t make heads or tails of solutions I’d found that suggested adding entries to /etc/fstab. So I ended up creating a shell script with this in it:

sudo mount -f vboxsf shared-folder-name /media/shared-name
return 0

Then I made the script executable using:

sudo chmod +x script.sh

Then added an entry to my /etc/rs.local file with something like this:

/path/to/script.sh

Once that was done my lovely VirtualBox shared folders were available to my various cron jobs when I started up my Ubuntu VM. Once the CRON jobs were run at least I’d have up-to-date backups on a disk in my office.

The New PC

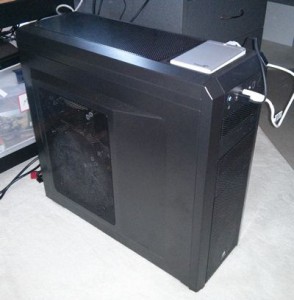
The New PC

A New PC

If there’s been one bit of luck in this whole episode it’s that I happened to have the makings of a new PC sitting in boxes in my office when the power surge happened. I’d been planning on upgrading my main PC and had bought the components in preparation of a leisurely build and test cycle before I transitioned to the new machine. Clearly there was a rush on and I needed the PC to act as a primary shared file server and to be running back scripts rather than my main development PC. So one very late Friday night later I had the machine built and Windows 7×64 Pro installed on it.

I don’t really want to talk to much about the specs of the PC because, well, it bores me. But if you want to know it’s an i5-3570 (my first Intel machine) on a ASUS motherboard with 16GB of ram, a Gigabyte 7850 video card, a 256GB SSD boot drive and a WD Green 2TB hard disk. I was primarily interested in keeping the machine quiet so there’s a high end modular PSU in the machine, a Noctua HSF combination with a low speed 150mm fan and it’s all sitting in a huge well ventilated Corsair Carbide 500R case. The machine seems to work well, is very quiet, and operates much cooler than the AMD based machine I’m using right now. I’ve installed VirtualBox on the new PC too and have Ubuntu running in it performing all of the required backup tasks that I had running on my main PC for just a day or two. The new PC is also acting as a central file repository on my network and is keeping synced copies of all critical files on several external USB drives. This setup will have to tide me over until the Mac returns.

Lessons Learned

This whole disaster could have been avoided if I’d just taken care with how I’d had the network switch had been plugged into the power. I suspect it wiped out the Mac Mini and the old ADSL modem via network cables. I’m just lucky it didn’t take out my main PC and laptop as well. We had minimal data loss because my last backup was just a few hours old. All backups here are automatic and the effort I put into the system a while back paid off in spades. Most of my time has been lost building the new PC, getting a grip on Ubuntu and how it works with VirtualBox, and running backwards and forwards to computer shops and repairers. I’ve also realised I needed a real UPS to allow me to gracefully shut down my computers when the power goes off next time.