The Problem
Our two car garage has a roller door on the front and back. The one on the front of the house is motorised and activated with a remote control. You cannot see if the front roller door is open from anywhere within our house so the only way to check if it is open is to walk outside and look. If you remember that is. The problem is that we do not want to go to bed and leave the front roller door on the garage open and we have done so a few times.
The Solution
Create some sort of sensor and indicator letting us know that the front roller door is open. The sensor should be reliable and the indicator should be obvious (especially when night has fallen) and not require us to walk outside to check on the status of the door. I’ve had an Arduino starter kit sitting on my desk for a while so (of course) I thought that the solution had to include an Arduino.
The Sensors
I wanted to detect if the door was up or down so this would require two sensors. Initially I was thinking along the lines of an ultrasonic detector but the cost of this was prohibitive as I needed two of them. In the end I settled on simple magnetic reed switches of the type you see in home security systems. One would be mounted to the door frame at the bottom and one at the top. A magnet would be fixed to the door to trigger the switches as the door moved up and down. The two door sensors with paired magnets were $5.
The Indicator
Initially I had thoughts of a two unit system. One sender unit mounted on the garage door and a receiver unit that sat inside with an indicator light with RF comms using one of the many different types of Arduino RF shields. But this was complete overkil so in the end I settled on 2 colour high intensity 3 watt LED that could be mounted outside our kitchen window and be driven by a cable. The LED module would need to be driven by a decent constant current power supply so I bought a couple of 330mA units at the same time. These PSU’s could be driven by a 0-5V PWM (pulse width modulated) signal to adjust the intensity of the driven LED. The LED module was $3, a heatsink to mount the LED on was $3, and the PSU’s were $9 each. A transparent poly-carbonate box to install the LED in was $9. The cable ended up being some 8 core alarm cable that cost about a dollar a meter and I used some 6 pin audio plugs for each end. Total cost for the cable was around $20 or so.
The Arduino
My Arduino kit contains a Arduino UNO clone. This was bigger than I wanted so I settled on a cloned Arduino Nano from eBay which was about $10. This had the digital inputs I wanted, more than enough memory to hold the simple sketch I’d write, could be run from a 12V DC plug pack, and the PWM outputs I’d need.
Enclosure and Breadboard
The enclosure would need to hold the Arduino Nano, the two LED PSU’s, and a small breadboard. It would also need to take the wires from the door sensors, have a female socket to take 12V and a female connector to plug our LED cable into. The breadboard was used to make a circuit that would ground out the sensor signals and route 3.3V to the sensors and 12V to the LED power supplies. All connections from the circuit to the Arduino and the Arduino to the power supply were done via connectors and cables I had laying around from old PC builds. Total cost of the enclosure and assorted components (and a 2A 12V DC plug pack) ran out to about $40.
Build Problems
One of the LED PSU’s was DOA so I settled on running just one of the LED colours. I chose to indicate different door states by flashing the LED at different rates. A second problem was that the roller door frame was significantly out of square and the magnets supplied with the reed switches were not strong enough to trigger the switches. I solved this by purchasing a rare earth magnet and gluing it to the roller door (cost was $12).
Arduino Code
I decided on a simple state engine for the code to run my indicator light. The first state was door down. In this state the Arduino was in a “door closed sleep” state waiting for an interrupt from the bottom door sensor. When the state of this sensor changed the Arduino would wake and enter a “door in transition” state and flash the LED rapidly. When the top sensor triggered the door would enter a third “door up” state and pulse the light slowly. When the roller door was lowered the Arduino would enter the “door in transition” state again and stay that way until the door closed and the bottom sensor was triggered. The Arduino would now enter a “door closed indicator” state and leave the LED on for 10 seconds before entering the “door closed sleep” state. Here’s the Arduino sketch I came up with to accomplish this:
#include <avr/interrupt.h>
#include <avr/power.h>
#include <avr/sleep.h>


const int blueLED = 3;
const int ledBrightness=50;
const int doorDownSensor=2;
const int doorUpSensor=4;
int doorDownSensorState=0;
int doorUpSensorState=0;
int oldDoorUpSensorState=0;
int oldDoorDownSensorState=0;
int tmpState=0;
int i=0;
int pulseStep=1;
int pulseBrightness=0;
unsigned long blueLEDStartTime;
String tmpString;

unsigned long endLastPulse;
unsigned long pulseDelay=3000;

void setup() {
  // put your setup code here, to run once:
  pinMode(blueLED,OUTPUT);
  pinMode(doorDownSensor,INPUT);
  pinMode(doorUpSensor,INPUT);

  Serial.begin(9600);
}

void loop() {
  tmpState=digitalRead(doorDownSensor);


  if (tmpState==HIGH)
    tmpString="HIGH ";
  else
    tmpString="LOW ";

  if (tmpState != oldDoorDownSensorState)
  {
    doorDownSensorState=1-doorDownSensorState;
    delay(50);
    if (doorDownSensorState==1)
    {
      blueLEDStartTime=millis();
    }
  }
  oldDoorDownSensorState=doorDownSensorState;

  tmpState=digitalRead(doorUpSensor);

  if (tmpState==HIGH)
    tmpString+="HIGH ";
  else
    tmpString+="LOW ";

  if (tmpState != oldDoorUpSensorState)
  {
    doorUpSensorState=1-doorUpSensorState;
    delay(50);
  }
  oldDoorUpSensorState=doorUpSensorState;

  tmpString+="DOWN_STATE::";
  tmpString+=doorDownSensorState;
  tmpString+=" UP_STATE::";
  tmpString+=doorUpSensorState;
  Serial.println(tmpString);

  if (doorDownSensorState==1)
  {
    if ((millis()-blueLEDStartTime)<=10000)
      analogWrite(blueLED,ledBrightness);
    else
    {
      analogWrite(blueLED,0);
      sleepNow();
    }
  }


  if (doorUpSensorState==1)
  {
    if (endLastPulse==0 || (millis()-endLastPulse)>pulseDelay)
    {
      pulseBrightness+=pulseStep;
      if (pulseBrightness<0)
      {
        pulseBrightness=0;
        pulseStep=-1*pulseStep;
        endLastPulse=millis();
      }
      if (pulseBrightness>ledBrightness)
      {
        pulseBrightness=ledBrightness;
        pulseStep=-1*pulseStep;
      }
      analogWrite(blueLED,pulseBrightness);
      delay(25);
    }

  }
  else
  {
    endLastPulse=0;
  }


  if (doorDownSensorState!=1 && doorUpSensorState!=1)
  {
    if ((millis() % 1000)<500)
      analogWrite(blueLED,ledBrightness);
    else
      analogWrite(blueLED,0);
  }


}

void sleepNow()
{
    // Set pin 2 as interrupt and attach handler:
    attachInterrupt(0, pinInterrupt, LOW);
    delay(100);
    //
    // Choose our preferred sleep mode:
    set_sleep_mode(SLEEP_MODE_PWR_DOWN);
    //
    // Set sleep enable (SE) bit:
    sleep_enable();
    //
    // Put the device to sleep:
    sleep_mode();
    //
    // Upon waking up, sketch continues from this point.
    sleep_disable();
}

void pinInterrupt(void)
{
  detachInterrupt(0);
}
There’s a couple of things to note here. First, the Nano only has interrupts on IO pins 2 and 3 so the bottom door sensor had to be on one of these pins. I used pin 2 which is interrupt 0. Also, I wanted to drive the LED power supply with a PWM signal so I had to use one of the PWM capable outputs, in my case I used pin 3.
I developed this code on my Arduino UNO with the circuit mocked up on a spring breadboard that came with my starters kit. Flashing the code to the Nano was troublesome because it turns out that the Nano I bought had a problem with the serial chip (UART) and just wouldn’t talk to my computer. After much googling I just needed to download and install an older driver for the USB/Serial driver on my PC and suddenly I could talk to the Nano.
Installation
The hardware mounted up easily enough. The reed switches included adhesive and stuck well enough to the door frame once I had cleaned the metal with some acetone. The door magnet was put in place with some cyano acrylate glue. Cabling from the sensors to the control box was cheap two core cable and the control box was mounted to the wall with some wall plugs I had lying around. A friend of mine helped me route the LED cable through my roof cavity and the LED box was stuck to one of the beams of the verandah outside our kitchen window.
Here’s one of the reed switches mounted to the top of the door frame. You can see the rare earth magnet (the silver disk) on the door itself.
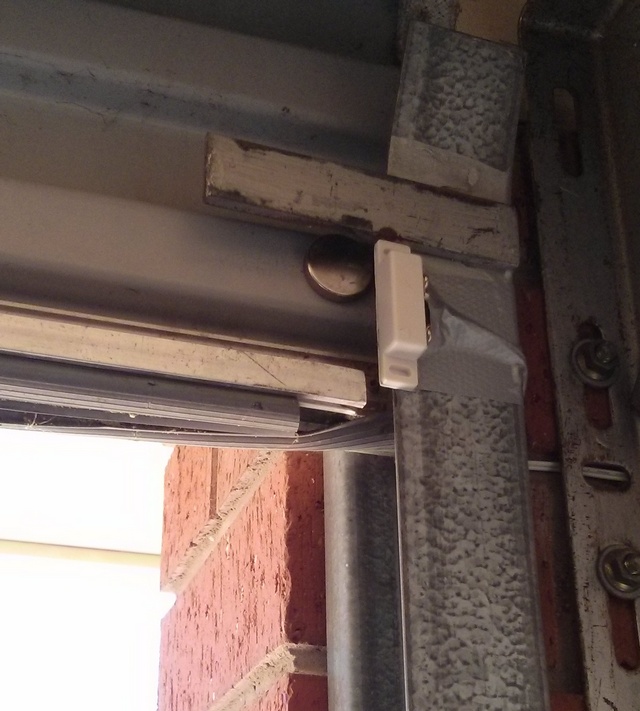
Reed Sensor and Magnet
And here’s the control box containing the Arduino Nano, home made circuit, and one of the constant current power supplies that drive the LED. The 12V power goes in via the plug at the bottom left while the cable coming out the top right goes into the roof cavity and drives the LED.
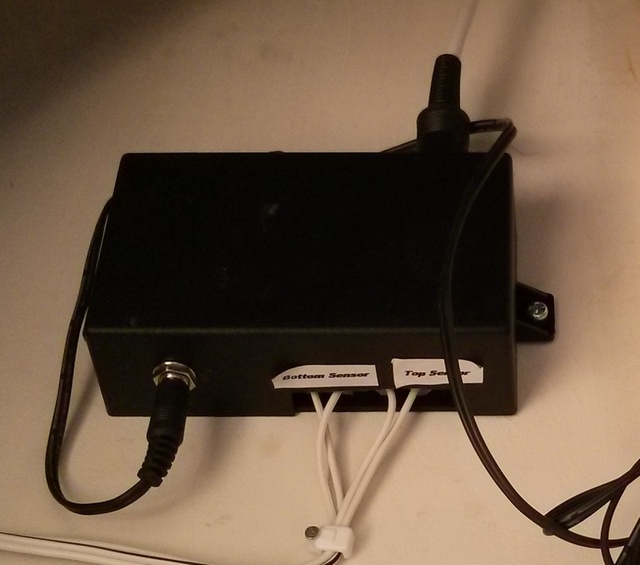
Arduino Enclosure
Finally, here’s the LED box mounted to a beam on our verandah. It’s the blue thing in the middle of the picture. You can see the cable running across to the top of the beam it’s mounted on.
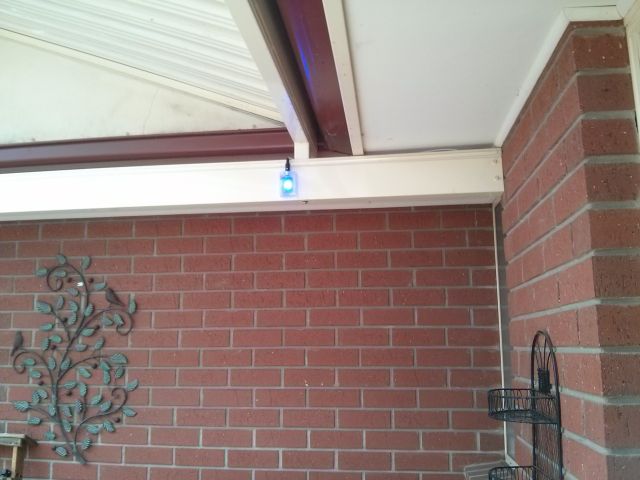
LED Enclosure
Here’s what it looks like in operation: