Despite being a non-drinker my lovely partner, Kathryn is enabling my new home brewing hobby with the quiet patience that only the most lucky of home brewer’s partners must show. She’s gone out of her way in the last couple of weeks to buy me a flash new 15 litre stainless steel brew pot and then some nice adhesive stencils so I could etch the inside of the pot with volume markings. This makes it far easier to fill the pot to a given volume of water without all that tedious mucking about with measuring jugs. Note that this method will only work on stainless steel and you should test it out on an unobtrusive part of the pot before you etch the inside. Any mistakes made in there will be looking back at you every time you brew so get it right. Here’s how I did it:
- Put a run of tape down the inside of the pot and then fill it with known volumes of water and mark the tape at each level. In my case I marked it at 2L, 4L, 5L, 6L, 8L, 10L, 12L, and 14L.
- Drain and thoroughly dry the pot.
- Stick stencils to the inside of the pot with tape so that they align with your markings on the tape. In my case I chose to have numerals next to the 10L and the 5L mark and just straight lines to mark off the other levels.
- Make a mixture of white vinegar and salt. I only made about 100mL and added a few grinds of salt from our salt grinder. I mixed it to dissolve the salt properly.
- Get two lengths of thin gauge electrical wire (about 50cm each) with the insulation stripped from the ends, a 9V rectangular battery (PP3 cell), and a number of cotton buds or cotton swaps or q-tips.
- Using electrical tape attach the end of one wire to the + (positive) terminal of the battery and tape the other end of the same wire to the side of the brew pot.
- Tape the end of the other wire to the – (negative) terminal of the battery and tape the other end of the wire to the end of the cotton bud so that the bare wire is pressed into the cotton bud near one end.
- Dip the end of the cotton bud with the wire on it into the vinegar and salt solution, gently wipe off the excess and then apply it to the stencils where you want to etch the pot gently working it slowly back and forth. There should be a gentle sizzling sound and perhaps some white vapour. That’s chlorine gas so make sure you do this in a well ventilated area.
- Re-dip the cotton bud as required and apply to the stencils until an even white etch is achieved on the stainless steel. I changed the cotton bud a few times because it got dirty and I didn’t like it. I suspect it doesn’t matter but I did it anyway.
The end result is pretty nice, perhaps a bit rough around the edges but not bad for a rank amateur like myself. See for yourself:
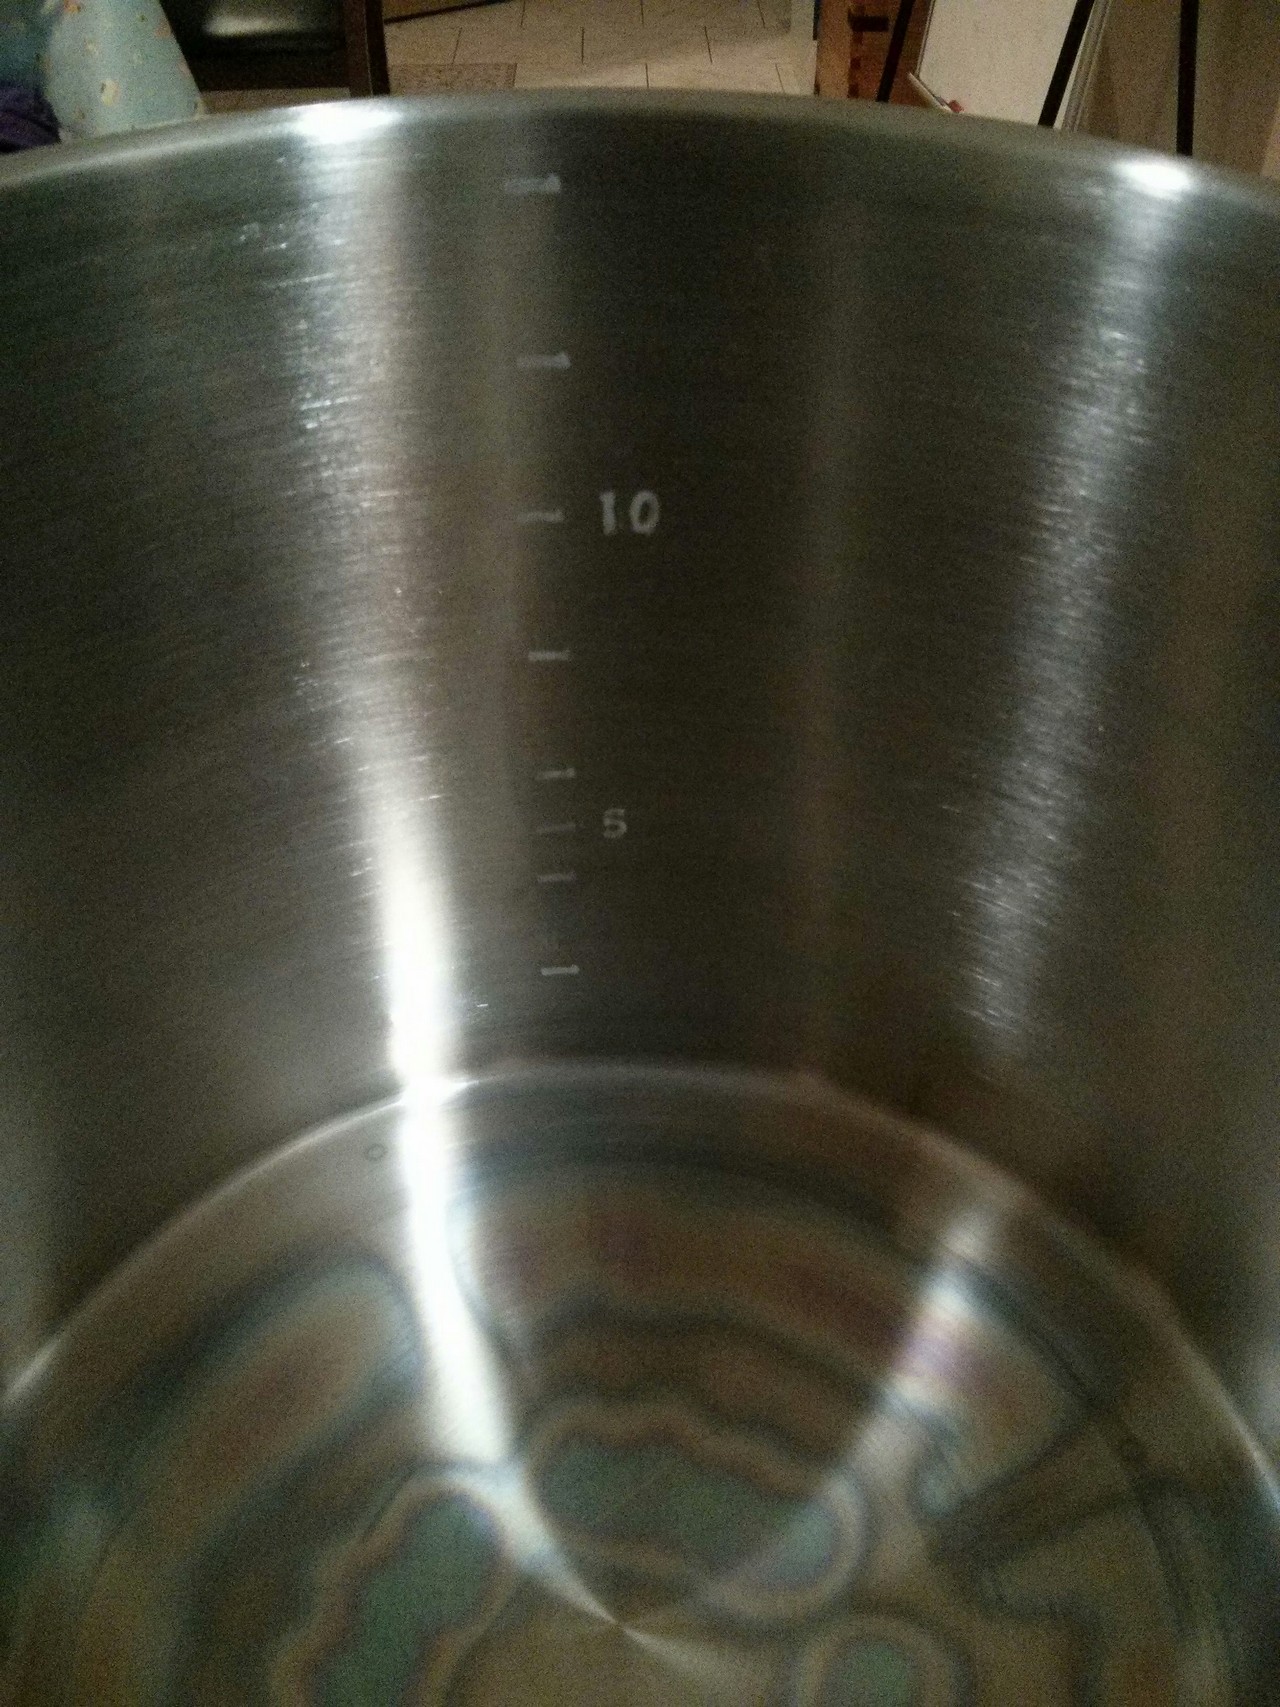
15L Brewpot with etching
Thanks to this article on Brew Your Own for the inspiration for this little project.